Not a member of Pastebin yet?
Sign Up,
it unlocks many cool features!
- # High Level API Calls - Popup's
- "High level calls" are those that start with "Popup". They are the most basic form of communications with the user. They are named after the type of window they create, a pop-up window. These windows are meant to be short lived while, either delivering information or collecting it, and then quickly disappearing.
- ## Popup Output
- Think of the `Popup` call as the GUI equivalent of a `print` statement. It's your way of displaying results to a user in the windowed world. Each call to Popup will create a new Popup window.
- `Popup` calls are normally blocking. your program will stop executing until the user has closed the Popup window. A non-blocking window of Popup discussed in the async section.
- Just like a print statement, you can pass any number of arguments you wish. They will all be turned into strings and displayed in the popup window.
- There are a number of Popup output calls, each with a slightly different look (e.g. different button labels).
- The list of Popup output functions are:
- - Popup
- - PopupOk
- - PopupYesNo
- - PopupCancel
- - PopupOkCancel
- - PopupError
- - PopupTimed, PopupAutoClose
- - PopupNoWait, PopupNonBlocking
- The trailing portion of the function name after Popup indicates what buttons are shown. `PopupYesNo` shows a pair of button with Yes and No on them. `PopupCancel` has a Cancel button, etc.
- While these are "output" windows, they do collect input in the form of buttons. The Popup functions return the button that was clicked. If the Ok button was clicked, then Popup returns the string 'Ok'. If the user clicked the X button to close the window, then the button value returned is `None`.
- The function `PopupTimed` or `PopupAutoClose` are popup windows that will automatically close after come period of time.
- Here is a quick-reference showing how the Popup calls look.
- ```
- sg.Popup('Popup') - Shows OK button
- sg.PopupOk('PopupOk') - Shows OK button
- sg.PopupYesNo('PopupYesNo') - Shows Yes and No buttons
- sg.PopupCancel('PopupCancel') - Shows Cancelled button
- sg.PopupOKCancel('PopupOKCancel') - Shows OK and Cancel buttons
- sg.PopupError('PopupError') - Shows red error button
- sg.PopupTimed('PopupTimed') - Automatically closes
- sg.PopupAutoClose('PopupAutoClose') - Same as PopupTimed
- ```
- Preview of popups:
- <p style="display: flex;justify-content: space-around;">
- <img src="https://user-images.githubusercontent.com/13696193/44957394-1380ab00-aea0-11e8-98b1-1ab7d7bd5b37.jpg">
- <img src="https://user-images.githubusercontent.com/13696193/44957400-167b9b80-aea0-11e8-9d42-2314f24e62de.jpg">
- <img src="https://user-images.githubusercontent.com/13696193/44957399-154a6e80-aea0-11e8-9580-e716f839d400.jpg">
- </p>
- <p style="display: flex;justify-content: space-around;">
- <img src="https://user-images.githubusercontent.com/13696193/44957398-14b1d800-aea0-11e8-9e88-c2b36a248447.jpg">
- <img src="https://user-images.githubusercontent.com/13696193/44957397-14b1d800-aea0-11e8-950b-6d0b4f33841a.jpg">
- <img src="https://user-images.githubusercontent.com/13696193/44957396-14194180-aea0-11e8-8eef-bb2e1193ecfa.jpg">
- <img src="https://user-images.githubusercontent.com/13696193/44957595-9e15da00-aea1-11e8-8909-6b6121b74509.jpg">
- </p>
- ```
- Popup(*args, Variable number of arguments you want to display
- button_color=None, Color of buttons (text_color, background_color)
- background_color=None, Color of background
- text_color=None, Color of text
- button_type=POPUP_BUTTONS_OK, Type of button layout
- auto_close=False, If True window will automatically close
- auto_close_duration=None, Number of seconds for autoclose
- non_blocking=False, If True returns immediately
- icon=DEFAULT_WINDOW_ICON, Icon to use on the taskbar
- line_width=None, Width of lines in characters
- font=None, Font to use for characters
- no_titlebar=False, If True no titlebar will be shown
- grab_anywhere=False, If True can move window by grabbing anywhere
- keep_on_top=False, If True window will be on top of other windows
- location=(None,None)): (x,y) coordinates to show the window
- ```
- The other output Popups are variations on parameters. Usually the button_type parameter is the primary one changed.
- The choices for button_type are:
- ```
- POPUP_BUTTONS_YES_NO
- POPUP_BUTTONS_CANCELLED
- POPUP_BUTTONS_ERROR
- POPUP_BUTTONS_OK_CANCEL
- POPUP_BUTTONS_OK
- POPUP_BUTTONS_NO_BUTTONS
- ```
- Note that you should not call Popup yourself with different button_types. Rely on the Popup function named that sets that value for you. For example PopupYesNo will set the button type to POPUP_BUTTONS_YES_NO for you.
- #### Scrolled Output
- There is a scrolled version of Popups should you have a lot of information to display.
- ```python
- PopupScrolled(*args, button_color=None, yes_no=False, auto_close=False, auto_close_duration=None, size=(None, None), location=(None, None), title=None, non_blocking=False)
- ```
- Typical usage:
- ```python
- sg.PopupScrolled(my_text)
- ```
- 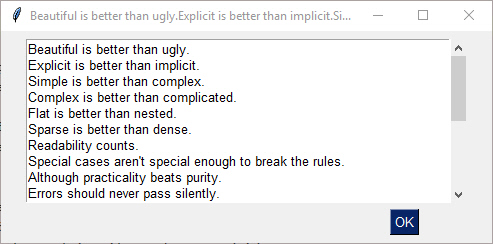
- The `PopupScrolled` will auto-fit the window size to the size of the text. Specify `None` in the height field of a `size` parameter to get auto-sized height.
- This call will create a scrolled box 80 characters wide and a height dependent upon the number of lines of text.
- sg.PopupScrolled(my_text, size=(80, None))
- Note that the default max number of lines before scrolling happens is set to 50. At 50 lines the scrolling will begin.
- If `non_blocking` parameter is set, then the call will not blocking waiting for the user to close the window. Execution will immediately return to the user. Handy when you want to dump out debug info without disrupting the program flow.
- ### PopupNoWait
- The Popup call PopupNoWait or PopupNonBlocking will create a popup window and then immediately return control back to you. All other popup functions will block, waiting for the user to close the popup window.
- This function is very handy for when you're **debugging** and want to display something as output but don't want to change the programs's overall timing by blocking. Think of it like a `print` statement. There are no return values on one of these Popups.
- ## Popup Input
- There are Popup calls for single-item inputs. These follow the pattern of `Popup` followed by `Get` and then the type of item to get. There are 3 of these input Popups to choose from, each with settings enabling customization.
- - `PopupGetText` - get a single line of text
- - `PopupGetFile` - get a filename
- - `PopupGetFolder` - get a folder name
- Use these Popups instead of making a custom window to get one data value, call the Popup input function to get the item from the user. If you find the parameters are unable to create the kind of window you are looking for, then it's time for you to create your own window.
- ### PopupGetText
- Use this Popup to get a line of text from the user.
- ```
- PopupGetText(message,The message you wish to display with the input field
- default_text='', Text to initially fill into the input field
- password_char='', Passwork character if this is a password field
- size=(None,None), Size of the window
- button_color=None, Color to use for buttons (foreground, background)
- background_color=None, Background color for window
- text_color=None, Text color for window
- icon=DEFAULT_WINDOW_ICON, Icon to display on taskbar
- font=None, Font to use for text
- no_titlebar=False, If True no titlebar will be shown
- grab_anywhere=False, If True can grab anywhere to move the window
- keep_on_top=False, If True window will stay on top of other windows
- location=(None,None)) Location on screen to display window
- ```
- ```python
- import PySimpleGUI as sg
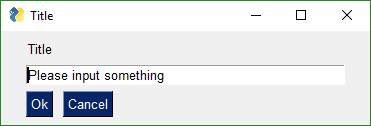
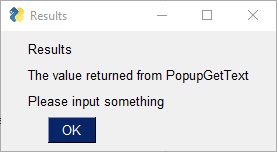
- text = sg.PopupGetText('Title', 'Please input something')
- sg.Popup('Results', 'The value returned from PopupGetText', text)
- ```
- 
- 
- ### PopupGetFile
- Gets a filename from the user. There are options to configure the type of dialog box to show. Normally an "Open File" dialog box is shown
- ```
- PopupGetFile(message, Message to show in the window
- default_path='', Path browsing should start from
- default_extension='', Which filetype is the default
- save_as=False, Determines which dialog box stype to show
- file_types=(("ALL Files", "*.*"),), Which filetypes are displayed
- no_window=False, if True no window is displayed except the dialog box
- size=(None,None), Size of window
- button_color=None, Color of buttons
- background_color=None, Color of window background
- text_color=None, Color of text in window
- icon=DEFAULT_WINDOW_ICON, Icon to show on taskbar
- font=None, Font to use
- no_titlebar=False, If True does not display a titlebar
- grab_anywhere=False, if True can grab window anywhere to move it
- keep_on_top=False, if True window will be on top of others
- location=(None,None)) Location on screen to show window
- ```
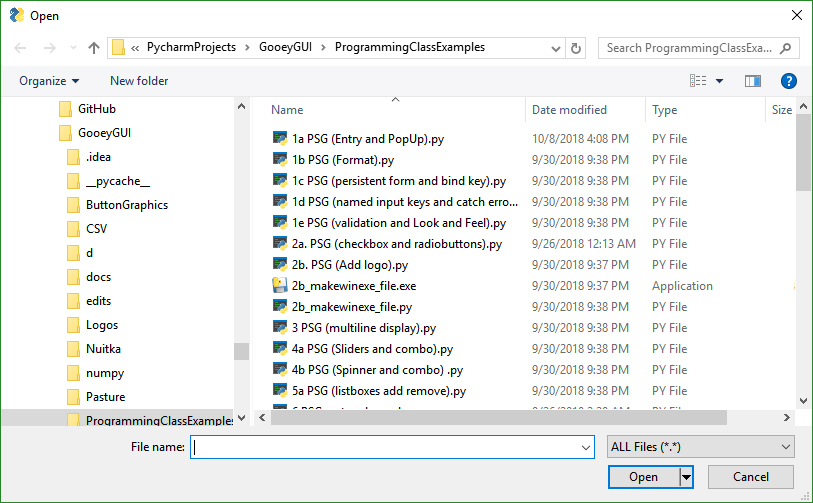
- If configured as an Open File Popup then (save_as is not True) the dialog box will look like this
- 
- If you set the parameter save_As to True, then the dialog box looks like this:
- 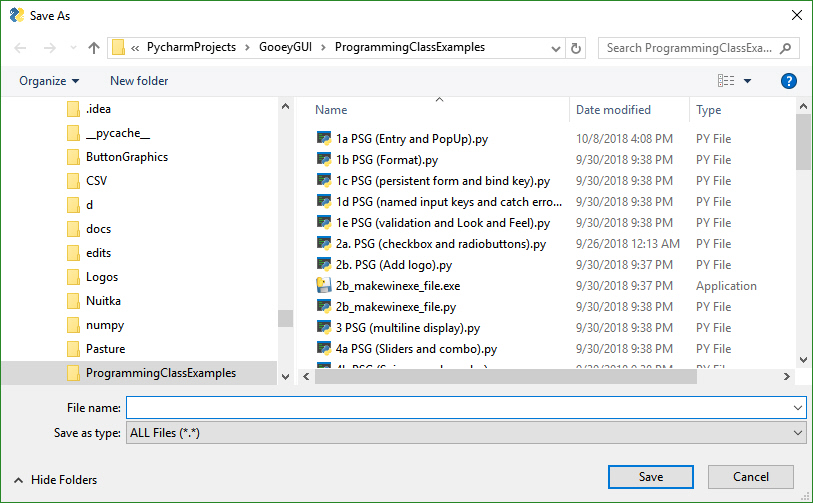
- If you choose a filename that already exists, you'll get a warning popup box asking if it's OK. You can also specify a file that doesn't exist. With an "Open" dialog box you cannot choose a non-existing file.
- A typical call produces this window.
- ```python
- text = sg.PopupGetFile('Please enter a file name')
- sg.Popup('Results', 'The value returned from PopupGetFile', text)
- ```
- 
- ### PopupGetFolder
- The window created to get a folder name looks the same as the get a file name. The difference is in what the browse button does. `PopupGetFile` shows an Open File dialog box while `PopupGetFolder` shows an Open Folder dialog box.
- ```
- PopupGetFolder(message, Message to display in window
- default_path='', Path to start browsing
- no_window=False, If True no window will be shown
- size=(None,None), Size of window
- button_color=None, Color of buttons
- background_color=None, Background color of window
- text_color=None, Color of window text
- icon=DEFAULT_WINDOW_ICON, Icon to show on taskbar
- font=None, Font to use for window
- no_titlebar=False, If True no titlebar will be shown
- grab_anywhere=False, If True can grab anywhere on window to move
- keep_on_top=False, If True window will be on top
- location=(None, None)) Location on screen to create window
- ```
- This is a typpical call
- ```python
- text = sg.PopupGetFolder('Please enter a folder name')
- sg.Popup('Results', 'The value returned from PopupGetFolder', text)
- ```
- 
- ### PopupAnimated
- 
- The animated Popup enables you to easily display a "loading" style animation specified through a GIF file that is either stored in a file or a base64 variable.
- ```python
- def PopupAnimated(image_source,
- message=None,
- background_color=None,
- text_color=None,
- font=None,
- no_titlebar=True,
- grab_anywhere=True,
- keep_on_top=True,
- location=(None, None),
- alpha_channel=.8,
- time_between_frames=0)
- ```
- | name | meaning |
- |-|-|
- |image_source | The GIF file specified as a string filename or a base64 variable |
- |message | optional text message to be displayed under the animation |
- |background_color | the background color to use for the window and all of the other parts of the window |
- |text_color | color to use for optional text |
- |font | font to use for the optional text |
- |no_titlebar | no titlebar window setting |
- |location | location to show the window |
- |alpha_channel | alpha channel to use for the window |
- |time_between_frames | amount of time in milliseconds to use between frames |
- |||
- ***To close animated popups***, call PopupAnimated with `image_source=None`. This will close all of the currently open PopupAnimated windows.
- # Progress Meters!
- We all have loops in our code. 'Isn't it joyful waiting, watching a counter scrolling past in a text window? How about one line of code to get a progress meter, that contains statistics about your code?
- ```
- OneLineProgressMeter(title,
- current_value,
- max_value,
- key,
- *args,
- orientation=None,
- bar_color=DEFAULT_PROGRESS_BAR_COLOR,
- button_color=None,
- size=DEFAULT_PROGRESS_BAR_SIZE,
- border_width=DEFAULT_PROGRESS_BAR_BORDER_WIDTH):
- ```
- Here's the one-line Progress Meter in action!
- ```python
- for i in range(1,10000):
- sg.OneLineProgressMeter('My Meter', i+1, 10000, 'key','Optional message')
- ```
- That line of code resulted in this window popping up and updating.
- 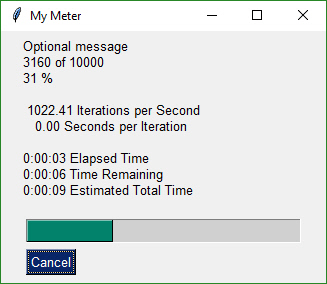
- A meter AND fun statistics to watch while your machine grinds away, all for the price of 1 line of code.
- With a little trickery you can provide a way to break out of your loop using the Progress Meter window. The cancel button results in a `False` return value from `OneLineProgressMeter`. It normally returns `True`.
- ***Be sure and add one to your loop counter*** so that your counter goes from 1 to the max value. If you do not add one, your counter will never hit the max value. Instead it will go from 0 to max-1.
- # Debug Output
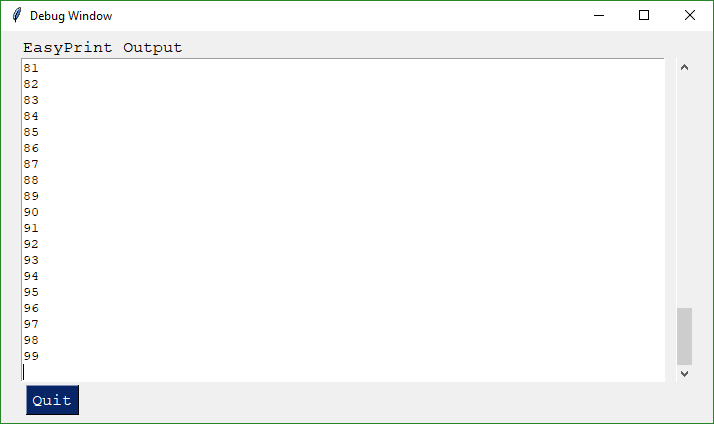
- Another call in the 'Easy' families of APIs is `EasyPrint`. It will output to a debug window. If the debug window isn't open, then the first call will open it. No need to do anything but stick a 'print' call in your code. You can even replace your 'print' calls with calls to EasyPrint by simply sticking the statement
- ```python
- print = sg.EasyPrint
- ```
- at the top of your code.
- There are a number of names for the same EasyPrint function. `Print` is one of the better ones to use as it's easy to remember. It is simply `print` with a capital P.
- ```python
- import PySimpleGUI as sg
- for i in range(100):
- sg.Print(i)
- ```
- 
- Or if you didn't want to change your code:
- ```python
- import PySimpleGUI as sg
- print=sg.Print
- for i in range(100):
- print(i)
- ```
- Just like the standard print call, `EasyPrint` supports the `sep` and `end` keyword arguments. Other names that can be used to call `EasyPrint` include `Print`, `eprint`, If you want to close the window, call the function `EasyPrintClose`.
- You can change the size of the debug window using the `SetOptions` call with the `debug_win_size` parameter.
- There is an option to tell PySimpleGUI to reroute all of your stdout and stderr output to this window. To do so call EasyPrint with the parameter `do_not_reroute_stdout` set to True. After calling it once with this parameter set to True, all future calls to a normal`print` will go to the debug window.
- If you close the debug window it will re-open the next time you Print to it.
- ---
- # Custom window API Calls (Your First window)
- This is the FUN part of the programming of this GUI. In order to really get the most out of the API, you should be using an IDE that supports auto complete or will show you the definition of the function. This will make customizing go smoother.
- This first section on custom windows is for your typical, blocking, non-persistent window. By this I mean, when you "show" the window, the function will not return until the user has clicked a button or closed the window. When this happens, the window will be automatically closed.
- Two other types of windows exist.
- 1. Persistent window - rather than closing on button clicks, the show window function returns and the window continues to be visible. This is good for applications like a chat window.
- 2. Asynchronous window - the trickiest of the lot. Great care must be exercised. Examples are an MP3 player or status dashboard. Async windows are updated (refreshed) on a periodic basis.
- It's both not enjoyable nor helpful to immediately jump into tweaking each and every little thing available to you.
- ## The window Designer
- The good news to newcomers to GUI programming is that PySimpleGUI has a window designer. Better yet, the window designer requires no training, no downloads, and everyone knows how to use it.
- 
- It's a manual process, but if you follow the instructions, it will take only a minute to do and the result will be a nice looking GUI. The steps you'll take are:
- 1. Sketch your GUI on paper
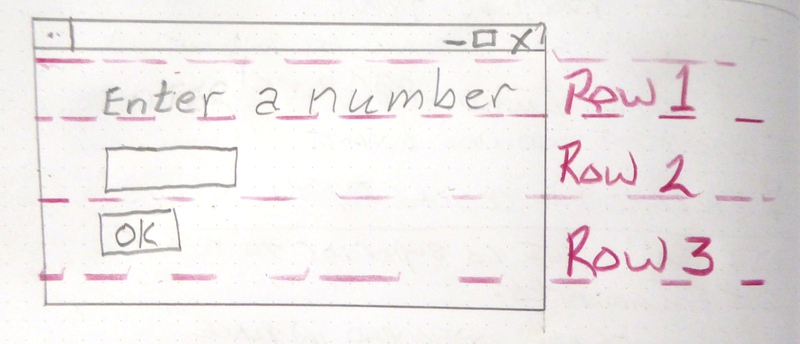
- 2. Divide your GUI up into rows
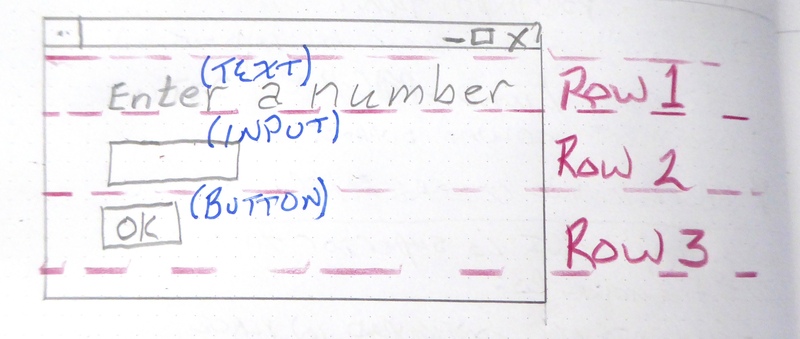
- 3. Label each Element with the Element name
- 4. Write your Python code using the labels as pseudo-code
- Let's take a couple of examples.
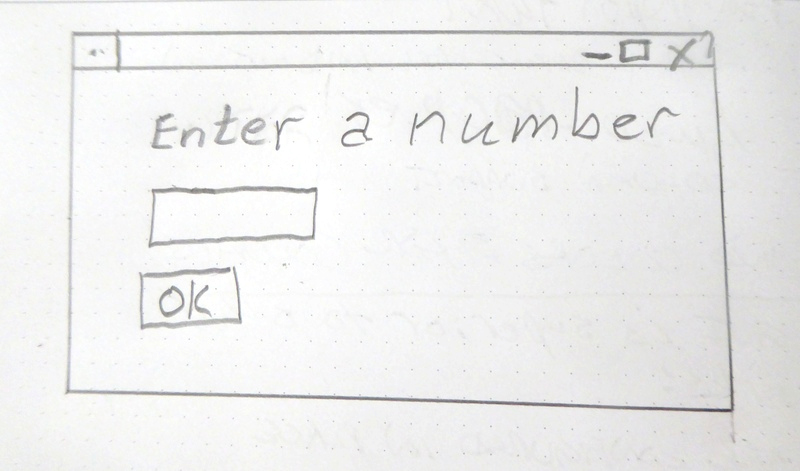
- **Enter a number**.... Popular beginner programs are often based on a game or logic puzzle that requires the user to enter something, like a number. The "high-low" answer game comes to mind where you try to guess the number based on high or low tips.
- **Step 1- Sketch the GUI**
- 
- **Step 2 - Divide into rows**
- 
- Step 3 - Label elements
- 
- Step 4 - Write the code
- The code we're writing is the layout of the GUI itself. This tutorial only focuses on getting the window code written, not the stuff to display it, get results.
- We have only 1 element on the first row, some text. Rows are written as a "list of elements", so we'll need [ ] to make a list. Here's the code for row 1
- ```
- [ sg.Text('Enter a number') ]
- ```
- Row 2 has 1 elements, an input field.
- ```
- [ sg.Input() ]
- ```
- Row 3 has an OK button
- ```
- [ sg.OK() ]
- ```
- Now that we've got the 3 rows defined, they are put into a list that represents the entire window.
- ```
- layout = [ [sg.Text('Enter a Number')],
- [sg.Input()],
- [sg.OK()] ]
- ```
- Finally we can put it all together into a program that will display our window.
- ```python
- import PySimpleGUI as sg
- layout = [[sg.Text('Enter a Number')],
- [sg.Input()],
- [sg.OK()] ]
- event, (number,) = sg.Window('Enter a number example', layout).Read()
- sg.Popup(event, number)
- ```
- ### Example 2 - Get a filename
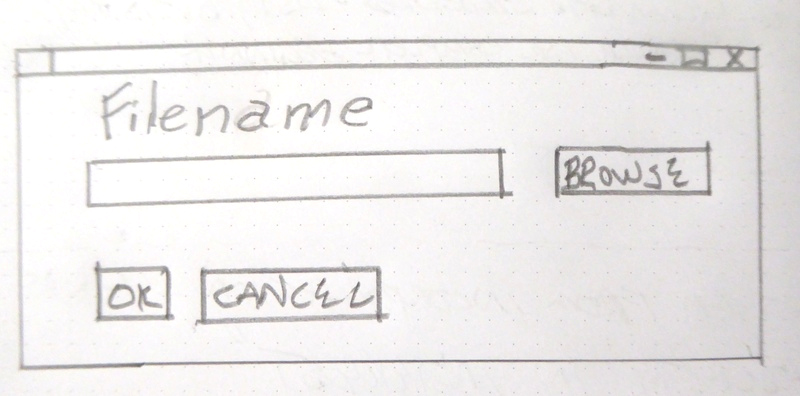
- Let's say you've got a utility you've written that operates on some input file and you're ready to use a GUI to enter than filename rather than the command line. Follow the same steps as the previous example - draw your window on paper, break it up into rows, label the elements.
- 
- 
- Writing the code for this one is just as straightforward. There is one tricky thing, that browse for a file button. Thankfully PySimpleGUI takes care of associating it with the input field next to it. As a result, the code looks almost exactly like the window on the paper.
- ```python
- import PySimpleGUI as sg
- layout = [[sg.Text('Filename')],
- [sg.Input(), sg.FileBrowse()],
- [sg.OK(), sg.Cancel()] ]
- event, (number,) = sg.Window('Get filename example', layout).Read()
- sg.Popup(event, number)
- ```
- Read on for detailed instructions on the calls that show the window and return your results.
- # Copy these design patterns!
- All of your PySimpleGUI programs will utilize one of these 2 design patterns depending on the type of window you're implementing.
- ## Pattern 1 - "One-shot Window" - Read into list or dictionary (**The Most Common** Pattern)
- This will be the most common pattern you'll follow if you are not using an "event loop" (not reading the window multiple times). The window is read and closes.
- It's unusual to assign the values returned from the read call directly into user variables. Usually the variables are grouped together into a list or dictionary of multiple return values.
- ```python
- import PySimpleGUI as sg
- window_rows = [[sg.Text('SHA-1 and SHA-256 Hashes for the file')],
- [sg.InputText(), sg.FileBrowse()],
- [sg.Submit(), sg.Cancel()]]
- window = sg.Window('SHA-1 & 256 Hash', window_rows)
- event, values = window.Read()
- window.Close()
- source_filename = values[0]
- ```
- ## Pattern 2 A - Persistent window (multiple reads using an event loop)
- Some of the more advanced programs operate with the window remaining visible on the screen. Input values are collected, but rather than closing the window, it is kept visible acting as a way to both output information to the user and gather input data.
- This code will present a window and will print values until the user clicks the exit button or closes window using an X.
- ```python
- import PySimpleGUI as sg
- layout = [[sg.Text('Persistent window')],
- [sg.Input(do_not_clear=True)],
- [sg.Button('Read'), sg.Exit()]]
- window = sg.Window('Window that stays open', layout)
- while True:
- event, values = window.Read()
- if event is None or event == 'Exit':
- break
- print(event, values)
- window.Close()
- ```
- ## Pattern 2 B - Persistent window (multiple reads using an event loop + updates data in window)
- This is a slightly more complex, but maybe more realistic version that reads input from the user and displays that input as text in the window. Your program is likely to be doing both of those activities so this will give you a big jump-start.
- Do not worry yet what all of these statements mean. Just copy it so you can begin to play with it, make some changes. Experiment to see how thing work.
- A final note... the parameter `do_not_clear` in the input call determines the action of the input field after a button event. If this value is True, the input value remains visible following button clicks. If False, then the input field is CLEARED of whatever was input. If you are building a "Form" type of window with data entry, you likely want False, the default setting (you can remove the parameter completely).
- ```python
- import sys
- if sys.version_info[0] >= 3:
- import PySimpleGUI as sg
- else:
- import PySimpleGUI27 as sg
- layout = [[sg.Text('Your typed chars appear here:'), sg.Text('', key='_OUTPUT_') ],
- [sg.Input(do_not_clear=True, key='_IN_')],
- [sg.Button('Show'), sg.Button('Exit')]]
- window = sg.Window('Window Title', layout)
- while True: # Event Loop
- event, values = window.Read()
- print(event, values)
- if event is None or event == 'Exit':
- break
- if event == 'Show':
- # change the "output" element to be the value of "input" element
- window.Element('_OUTPUT_').Update(values['_IN_'])
- window.Close()
- ```
- ## How GUI Programming in Python Should Look? At least for beginners ?
- While one goal was making it simple to create a GUI another just as important goal was to do it in a Pythonic manner. Whether it achieved these goals is debatable, but it was an attempt just the same.
- The key to custom windows in PySimpleGUI is to view windows as ROWS of GUI Elements. Each row is specified as a list of these Elements. Put the rows together and you've got a window. This means the GUI is defined as a series of Lists, a Pythonic way of looking at things.
- Let's dissect this little program
- ```python
- import PySimpleGUI as sg
- layout = [[sg.Text('Rename files or folders')],
- [sg.Text('Source for Folders', size=(15, 1)), sg.InputText(), sg.FolderBrowse()],
- [sg.Text('Source for Files ', size=(15, 1)), sg.InputText(), sg.FolderBrowse()],
- [sg.Submit(), sg.Cancel()]]
- window = sg.Window('Rename Files or Folders', layout)
- event, values = window.Read()
- ```
- 
- Let's agree the window has 4 rows.
- The first row only has **text** that reads `Rename files or folders`
- The second row has 3 elements in it. First the **text** `Source for Folders`, then an **input** field, then a **browse** button.
- Now let's look at how those 2 rows and the other two row from Python code:
- ```python
- layout = [[sg.Text('Rename files or folders')],
- [sg.Text('Source for Folders', size=(15, 1)), sg.InputText(), sg.FolderBrowse()],
- [sg.Text('Source for Files ', size=(15, 1)), sg.InputText(), sg.FolderBrowse()],
- [sg.Submit(), sg.Cancel()]]
- ```
- See how the source code mirrors the layout? You simply make lists for each row, then submit that table to PySimpleGUI to show and get values from.
- And what about those return values? Most people simply want to show a window, get the input values and do something with them. So why break up the code into button callbacks, etc, when I simply want my window's input values to be given to me.
- For return values the window is scanned from top to bottom, left to right. Each field that's an input field will occupy a spot in the return values.
- In our example window, there are 2 fields, so the return values from this window will be a list with 2 values in it.
- ```python
- event, values = window.Read()
- folder_path, file_path = values
- ```
- In one statement we both show the window and read the user's inputs. In the next the *list* of return values is split into individual variables `folder_path` and `file_path`.
- Isn't this what a Python programmer looking for a GUI wants? Something easy to work with to get the values and move on to the rest of the program, where the real action is taking place. Why write pages of GUI code when the same layout can be achieved with PySimpleGUI in 3 or 4 lines of code. 4 lines or 40? Most would choose 4.
- ## Return values
- As of version 2.8 there are 2 forms of return values, list and dictionary.
- ### Two Return Values
- All Window Read calls return 2 values. By convention a read statement is written:
- ```python
- event, values = window.Read()
- ```
- You don't HAVE to write your reads in this way. You can name your variables however you want. But if you want to code them in a way that other programmers using PySimpleGUI are used to, then use these statements.
- ## Events
- The first parameter `event` describes **why** the read completed. Events are one of these:
- For all Windows:
- * Button click
- * Window closed using X
- For Windows that have specifically enabled these. Please see the appropriate section in this document to learn about how to enable these and what the event return values are.
- * Keyboard key press
- * Mouse wheel up/down
- * Menu item selected
- * An Element Changed (slider, spinner, etc)
- * A list item was clicked
- * Return key was pressed in input element
- * Timeout waiting for event
- * Text was clicked
- * Combobox item chosen
- * Table row selected
- * etc
- ***Most*** of the time the event will be a button click or the window was closed.
- ### Window closed event
- Another convention to follow is the check for windows being closed with an X. This is an important event to catch. If you don't check for this and you attempt to use the window, your program will crash. Please check for closed window and exit your program gracefully.
- To check for a closed window use this line of code:
- ```python
- if event is None:
- ```
- Putting it all together we end up with an "event loop" that looks something like this:
- ```python
- while True:
- event, values = window.Read()
- if event is None:
- break
- ```
- ### Button Click Events
- By default buttons will always return a click event, or in the case of realtime buttons, a button down event. You don't have to do anything to enable button clicks. To disable the events, disable the button using its Update method.
- You can enable an additional "Button Modified" event by setting `enable_events=True` in the Button call. These events are triggered when something 'writes' to a button, ***usually*** it's because the button is listed as a "target" in another button.
- The button value from a Read call will be one of 2 values:
- 1. The Button's text - Default
- 2. The Button's key - If a key is specified
- If a button has a key set when it was created, then that key will be returned. If no key is set, then the button text is returned. If no button was clicked, but the window returned anyway, the event value is None.
- ### **None is returned when the user clicks the X to close a window.**
- If your window has an event loop where it is read over and over, remember to give your user an "out". You should ***always check for a None value*** and it's a good practice to provide an Exit button of some kind. Thus design patterns often resemble this Event Loop:
- ```python
- while True:
- event, values = window.Read()
- if event is None or event == 'Quit':
- break
- ```
- ### Element Events
- Some elements are capable of generating events when something happens to them. For example, when a slider is moved, or list item clicked on or table row clicked on. These events are not enabled by default. To enable events for an Element, set the parameter `enable_events=True`. This is the same as the older `click_submits` parameter. You will find the `click_submits` parameter still in the function definition. You can continue to use it. They are the same setting. An 'or' of the two values is used. In the future, click_submits will be removed so please migrate your code to using `enable_events`.
- | name | events |
- | - | - |
- | InputText | any change |
- | Combo | item chosen |
- | Option menu | item chosen |
- | Listbox | selection changed |
- | Radio | selection changed |
- | Checkbox | selection changed |
- | Spinner | new item selected |
- | Multiline | any change |
- | Text | clicked |
- | Status Bar | clicked |
- | Graph | clicked |
- | TabGroup | tab clicked |
- | Slider | slider moved |
- | Table | row selected |
- | Tree | node selected |
- | ButtonMenu | menu item chosen |
- | Right click menu | menu item chosen |
- ### Other Events
- #### Menubar menu item chosen for MenuBar menus and ButtonMenu menus
- You will receive the key for the MenuBar and ButtonMenu. Use that key to read the value in the return values dictionary. The value shown will be the full text plus key for the menu item chosen. Remember that you can put keys onto menu items. You will get the text and the key together as you defined it in the menu
- definition.
- #### Right Click menu item chosen
- Unlike menu bar and button menus, you will directly receive the menu item text and its key value. You will not do a dictionary lookup to get the value. It is the event code returned from WindowRead().
- #### Windows - keyboard, mouse scroll wheel
- Windows are capable of returning keyboard events. These are returned as either a single character or a string if it's a special key. Experiment is all I can say. The mouse scroll wheel events are also strings. Put a print in your code to see what's returned.
- #### Timeouts
- If you set a timeout parameter in your read, then the system TIMEOUT_KEY will be returned. If you specified your own timeout key in the Read call then that value will be what's returned instead.
- ### The `values` Variable - Return values as a list
- The second parameter from a Read call is either a list or a dictionary of the input fields on the Window.
- By default return values are a list of values, one entry for each input field.
- Each of the Elements that are Input Elements will have a value in the list of return values. You can unpack your GUI directly into the variables you want to use.
- event, (filename, folder1, folder2, should_overwrite) = sg.Window('My title', window_rows).Read()
- Or, more commonly, you can unpack the return results separately.
- ```python
- event, values = sg.Window('My title', window_rows).Read()
- event, value_list = window.Read()
- value1 = value_list[0]
- value2 = value_list[1]
- ...
- ```
- However, this method isn't good when you have a lot of input fields. If you insert a new element into your window then you will have to shuffle your unpacks down, modifying each of the statements to reference `value_list[x] `.
- The more common / advanced method is to request your values be returned as a dictionary.
- ### `values` Variable - Return values as a dictionary
- For those of you that have not encountered a Python dictionary, don't freak out! Just copy and paste the sample code and modify it. Follow this design pattern and you'll be fine. And you might learn something along the way.
- For windows longer than 3 or 4 fields you will want to use a dictionary to help you organize your return values. In almost all (if not all) of the demo programs you'll find the return values being passed as a dictionary. It is not a difficult concept to grasp, the syntax is easy to understand, and it makes for very readable code.
- The most common window read statement you'll encounter looks something like this:
- `window = sg.Window("My title", layout).Read()`
- To use a dictionary, you will need to:
- * Mark each input element you wish to be in the dictionary with the keyword `key`.
- If **any** element in the window has a `key`, then **all** of the return values are returned via a dictionary. If some elements do not have a key, then they are numbered starting at zero.
- Let's take a look at your first dictionary-based window.
- ```python
- import PySimpleGUI as sg
- layout = [
- [sg.Text('Please enter your Name, Address, Phone')],
- [sg.Text('Name', size=(15, 1)), sg.InputText('1', key='_name_')],
- [sg.Text('Address', size=(15, 1)), sg.InputText('2', key='_address_')],
- [sg.Text('Phone', size=(15, 1)), sg.InputText('3', key='_phone_')],
- [sg.Submit(), sg.Cancel()]
- ]
- window = sg.Window('Simple data entry window', layout)
- event, values = window.Read()
- sg.Popup(event, values, values['_name_'], values['_address_'], values['_phone_'])
- ```
- To get the value of an input field, you use whatever value used as the `key` value as the index value. Thus to get the value of the name field, it is written as
- values['name']
- Think of the variable values in the same way as you would a list, however, instead of using 0,1,2, to reference each item in the list, use the values of the key. The Name field in the window above is referenced by `values['_name_']`.
- You will find the key field used quite heavily in most PySimpleGUI windows unless the window is very simple.
- Another convention you'll see in some of the demo programs is keys being named with an underscore at the beginning and the end. You don't HAVE to do this... your key value may look like this:
- `key = 'name'`
- The reason for this naming convention is that when you are scanning the code, these key values jump out at you. You instantly know it's a key. Try scanning the code above and see if those keys pop out.
- `key = '_name_'`
- ## The Event Loop / Callback Functions
- All GUIs have one thing in common, an "event loop". Usually the GUI framework runs the event loop for you, but sometimes you want greater control and will run your own event loop. You often hear the term event loop when discussing embedded systems or on a Raspberry Pi.
- With PySimpleGUI if your window will remain open following button clicks, then your code will have an event loop. If your program shows a single "one-shot" window, collects the data and then has no other GUI interaction, then you don't need an event loop.
- There's nothing mysterious about event loops... they are loops where you take care of.... wait for it..... *events*. Events are things like button clicks, key strokes, mouse scroll-wheel up/down.
- Let's take a Pi demo program as an example. This program shows a GUI window, gets button presses, and uses them to control some LEDs. It loops, reading user input and doing something with it.
- This little program has a typical Event Loop
- 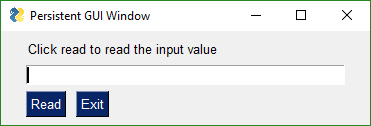
- ```python
- import PySimpleGUI as sg
- layout = [[sg.Text('Click read to read the input value')],
- [sg.Input()],
- [sg.RButton('Read'), sg.Exit()]]
- window = sg.Window('Persistent GUI Window', layout)
- while True:
- event, values = window.Read()
- if event is None or event == 'Exit':
- break
- print(event, values)
- window.Close()
- ```
- In the Event Loop we are reading the window and then doing a series of button compares to determine what to do based on the button that was clicks (value of `button` variable)
- The way buttons are presented to the caller in PySimpleGUI is ***not*** how *most* GUI frameworks handle button clicks. Most GUI frameworks, including tkinter, use ***callback*** functions, a function you define would be called when a button is clicked. This requires you to write asynchronous code, a concept beginners often stumble on and one that presents a barrier.
- There is a more communications that have to happen between parts of your program when using callbacks. Callbacks break apart your program's logic apart and scatter it. One of the larger hurdles for beginners to GUI programming are these callback functions.
- PySimpleGUI was specifically designed in a way so that callbacks would not be required. There is no coordination between one function and another required. You simply read your button click and take appropriate action at the same location in the code as when you read the button value.
- Whether or not this is a "proper" design for GUI programs can be debated. It's not a terrible trade-off to run your own event loop and having a functioning GUI application versus one that maybe never gets written because callback functions were too much to grasp.
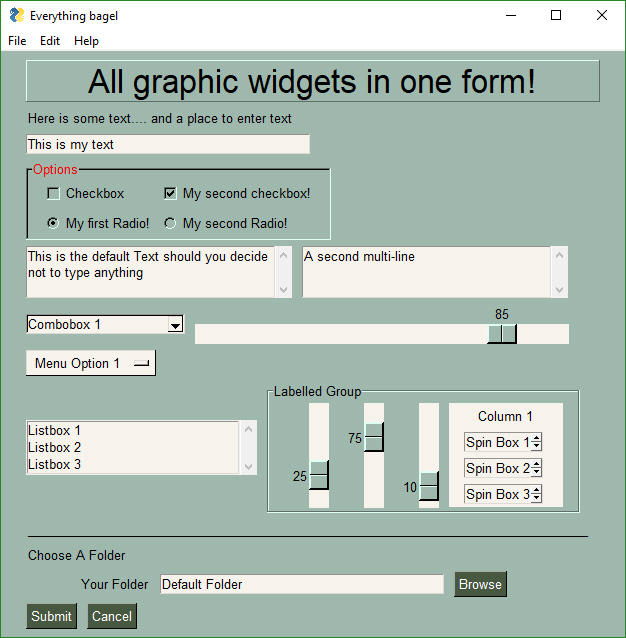
- ## All Widgets / Elements
- This code utilizes many of the common Elements. It does not include Tabs/Tab Groups.
- ```python
- import PySimpleGUI as sg
- sg.ChangeLookAndFeel('GreenTan')
- # ------ Menu Definition ------ #
- menu_def = [['File', ['Open', 'Save', 'Exit', 'Properties']],
- ['Edit', ['Paste', ['Special', 'Normal', ], 'Undo'], ],
- ['Help', 'About...'], ]
- # ------ Column Definition ------ #
- column1 = [[sg.Text('Column 1', background_color='#F7F3EC', justification='center', size=(10, 1))],
- [sg.Spin(values=('Spin Box 1', '2', '3'), initial_value='Spin Box 1')],
- [sg.Spin(values=('Spin Box 1', '2', '3'), initial_value='Spin Box 2')],
- [sg.Spin(values=('Spin Box 1', '2', '3'), initial_value='Spin Box 3')]]
- layout = [
- [sg.Menu(menu_def, tearoff=True)],
- [sg.Text('All graphic widgets in one window!', size=(30, 1), justification='center', font=("Helvetica", 25), relief=sg.RELIEF_RIDGE)],
- [sg.Text('Here is some text.... and a place to enter text')],
- [sg.InputText('This is my text')],
- [sg.Frame(layout=[
- [sg.Checkbox('Checkbox', size=(10,1)), sg.Checkbox('My second checkbox!', default=True)],
- [sg.Radio('My first Radio! ', "RADIO1", default=True, size=(10,1)), sg.Radio('My second Radio!', "RADIO1")]], title='Options',title_color='red', relief=sg.RELIEF_SUNKEN, tooltip='Use these to set flags')],
- [sg.Multiline(default_text='This is the default Text should you decide not to type anything', size=(35, 3)),
- sg.Multiline(default_text='A second multi-line', size=(35, 3))],
- [sg.InputCombo(('Combobox 1', 'Combobox 2'), size=(20, 1)),
- sg.Slider(range=(1, 100), orientation='h', size=(34, 20), default_value=85)],
- [sg.InputOptionMenu(('Menu Option 1', 'Menu Option 2', 'Menu Option 3'))],
- [sg.Listbox(values=('Listbox 1', 'Listbox 2', 'Listbox 3'), size=(30, 3)),
- sg.Frame('Labelled Group',[[
- sg.Slider(range=(1, 100), orientation='v', size=(5, 20), default_value=25),
- sg.Slider(range=(1, 100), orientation='v', size=(5, 20), default_value=75),
- sg.Slider(range=(1, 100), orientation='v', size=(5, 20), default_value=10),
- sg.Column(column1, background_color='#F7F3EC')]])],
- [sg.Text('_' * 80)],
- [sg.Text('Choose A Folder', size=(35, 1))],
- [sg.Text('Your Folder', size=(15, 1), auto_size_text=False, justification='right'),
- sg.InputText('Default Folder'), sg.FolderBrowse()],
- [sg.Submit(tooltip='Click to submit this window'), sg.Cancel()]
- ]
- window = sg.Window('Everything bagel', layout, default_element_size=(40, 1), grab_anywhere=False)
- event, values = window.Read()
- sg.Popup('Title',
- 'The results of the window.',
- 'The button clicked was "{}"'.format(event),
- 'The values are', values)
- ```
- This is a somewhat complex window with quite a bit of custom sizing to make things line up well. This is code you only have to write once. When looking at the code, remember that what you're seeing is a list of lists. Each row contains a list of Graphical Elements that are used to create the window.
- 
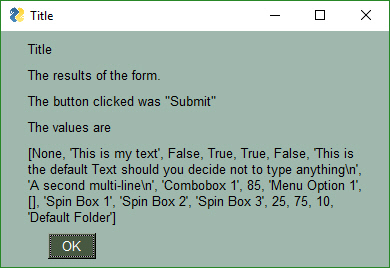
- Clicking the Submit button caused the window call to return. The call to Popup resulted in this window.
- 
- **`Note, button value can be None`**. The value for `button` will be the text that is displayed on the button element when it was created. If the user closed the window using something other than a button, then `button` will be `None`. It is ***vitally*** ***important*** that your code contain the proper checks for None. Always give your users a way out of the window. Otherwise you'll end up with windows that never properly close.
- You can see in the results Popup window that the values returned are a list. Each input field in the window generates one item in the return values list. All input fields return a `string` except for Check Boxes and Radio Buttons. These return `bool`.
- # Building Custom Windows
- You will find it ***much easier*** to write code using PySimpleGUI if you use an IDE such as PyCharm. The features that show you documentation about the API call you are making will help you determine which settings you want to change, if any. In PyCharm, two commands are particularly helpful.
- Control-Q (when cursor is on function name) brings up a box with the function definition
- Control-P (when cursor inside function call "()") shows a list of parameters and their default values
- ## Synchronous windows
- The most common use of PySimpleGUI is to display and collect information from the user. The most straightforward way to do this is using a "blocking" GUI call. Execution is "blocked" while waiting for the user to close the GUI window/dialog box.
- You've already seen a number of examples above that use blocking windows. A truly non-blocking Read call looks like this:
- ```python
- event, values = window.Read(timeout=0)
- ```
- You can learn more about these async / non-blocking windows toward the end of this document.
- # Window Object - Beginning a window
- The first step is to create the window object using the desired window customization.
- This is the definition of the Window object:
- ```python
- Window( title,
- default_element_size=DEFAULT_ELEMENT_SIZE,
- default_button_element_size=(None,None),
- auto_size_text=None,
- auto_size_buttons=None,
- location=(None,None),
- size=(None,None),
- element_padding=None,
- button_color=None,
- font=None,
- progress_bar_color=(None,None),
- background_color=None,
- border_depth=None,
- auto_close=False,
- auto_close_duration=DEFAULT_AUTOCLOSE_TIME,
- icon=DEFAULT_WINDOW_ICON,
- force_toplevel=False,
- alpha_channel=1,
- return_keyboard_events=False,
- use_default_focus=True,
- text_justification=None,
- no_titlebar=False,
- grab_anywhere=False,
- keep_on_top=False,
- resizable=False,
- disable_close=False,
- disable_minimize=False,
- right_click_menu=None):
- ```
- Parameter Descriptions. You will find these same parameters specified for each `Element` and some of them in `Row` specifications. The `Element` specified value will take precedence over the `Row` and `window` values.
- | Name | Meaning |
- | - | - |
- | default_element_size | Size of elements in window in characters (width, height) |
- | default_button_element_size | Size of buttons on this window |
- | auto_size_text | Bool. True if elements should size themselves according to contents. Defaults to True |
- | auto_size_buttons | Bool. True if button elements should size themselves according to their text label |
- | location | (x,y) Location to place window in pixels |
- | size | (w,h) forces a window to be a paricular size|
- | element_padding | (w,h) default padding amount for elements|
- | font | Font name and size for elements of the window |
- | button_color | Default color for buttons (foreground, background). Can be text or hex |
- | progress_bar_color | Foreground and background colors for progress bars |
- | background_color | Color of the window background |
- | border_depth | Amount of 'bezel' to put on input boxes, buttons, etc. |
- | auto_close | Bool. If True window will autoclose |
- | auto_close_duration | Duration in seconds before window closes |
- | icon | .ICO file that will appear on the Task Bar and end of Title Bar |
- | force_top_level | Bool. If set causes a tk.Tk window to be used as primary window rather than tk.TopLevel. Used to get around Matplotlib problem |
- | alpha_channel | Float 0 to 1. 0 is invisible, 1 is fully visible, Anything between will be semi-transparent |
- | return_keyboard_events | if True key presses are returned as buttons |
- | use_default_focus | if True and no focus set, then automatically set a focus |
- | text_justification | Justification to use for Text Elements in this window |
- | no_titlebar | Create window without a titlebar |
- | grab_anywhere | Grab any location on the window to move the window |
- | keep_on_top | if True then window will always stop on top of other windows on the screen. Great for floating toolbars. |
- | resizable | if True | user can manually changge the wize of the window. Defaults to False|
- | disable_close | if True user will not be able to close using the X. |
- | disable_minimize | if True user will not be able to minimize the window|
- | right_click_menu | menu definition that will be used on wall elements that support right click. If a definition is specified on an element then it will be used instead.|
- | | |
- ### Window Location
- PySimpleGUI computes the exact center of your window and centers the window on the screen. If you want to locate your window elsewhere, such as the system default of (0,0), if you have 2 ways of doing this. The first is when the window is created. Use the `location` parameter to set where the window. The second way of doing this is to use the `SetOptions` call which will set the default window location for all windows in the future.
- ### Window Size
- You can get your window's size by access the `Size`property. The window has to be Read once or Finalized in order for the value to be correct. Note that it's a property, not a call.
- `my_windows_size = window.Size`
- To finalize your window:
- ```pytyhon
- window = Window('My Title', layout).Finalize()
- ```
- ### Element Sizes
- Note several variables that deal with "size". Element sizes are measured in characters. A Text Element with a size of 20,1 has a size of 20 characters wide by 1 character tall.
- The default Element size for PySimpleGUI is `(45,1)`.
- Sizes can be set at the element level, or in this case, the size variables apply to all elements in the window. Setting `size=(20,1)` in the window creation call will set all elements in the window to that size.
- There are a couple of widgets where one of the size values is in pixels rather than characters. This is true for Progress Meters and Sliders. The second parameter is the 'height' in pixels.
- ### No Titlebar
- Should you wish to create cool looking windows that are clean with no windows titlebar, use the no_titlebar option when creating the window.
- Be sure an provide your user an "exit" button or they will not be able to close the window! When no titlebar is enabled, there will be no icon on your taskbar for the window. Without an exit button you will need to kill via taskmanager... not fun.
- Windows with no titlebar rely on the grab anywhere option to be enabled or else you will be unable to move the window.
- Windows without a titlebar can be used to easily create a floating launcher.
- Linux users! Note that this setting has side effects for some of the other Elements. Multi-line input doesn't work at all, for example So, use with caution.
- 
- ### Grab Anywhere
- This is a feature unique to PySimpleGUI.
- Note - there is a warning message printed out if the user closes a non-blocking window using a button with grab_anywhere enabled. There is no harm in these messages, but it may be distressing to the user. Should you wish to enable for a non-blocking window, simply get grab_anywhere = True when you create the window.
- ### Always on top
- To keep a window on top of all other windows on the screen, set keep_on_top = True when the window is created. This feature makes for floating toolbars that are very helpful and always visible on your desktop.
- ### Focus
- PySimpleGUI will set a default focus location for you. This generally means the first input field. You can set the focus to a particular element. If you are going to set the focus yourself, then you should turn off the automatic focus by setting `use_default_focus=False` in your Window call.
- ### Window Methods (things you can do with a Window object)
- There are a few methods (functions) that you will see in this document that act on Windows. The ones you will primarily be calling are:
- window.Layout(layout) - Recommend moving away from this nethod and using layout parameter instead. Turns your definition of the Window into Window
- window.Finalize() - creates the tkinter objects for the Window. Normally you do not call this
- window.Read() - Read the Windows values and get the button / key that caused the Read to return. Can have an optional timeout
- window.ReadNonBlocking() - NO LONGER USED!
- window.Refresh() - Use if updating elements and want to show the updates prior to the nex Read
- window.Fill(values_dict) - Fill each Element with entry from the dictionary passed in
- window.SaveToDisk(filename) - Save the Window's values to disk
- window.LoadFromDisk(filename) - Load the Window's values from disk
- window.Close() - To close your window, if a button hasn't already closed it
- window.Disable() - Use to disable the window inputwhen opening another window on top of the primnary Window
- window.Enable() - Re-enable a Disabled window
- window.FindElement(key, silent_on_error=False) - Returns the element that has a matching key value
- window.Element(key, silent_on_error=False) - EXACTLY the same as calling FindElement
- window.Move(x,y) - Moves window to location x,y on screen'
- window.SetAlpha(alpha) - Changes window transparency
- window.BringToFront() - Brings the window to the top of other windows on the screen
- window.Disappear(), Reappear() - Uses alpha channel to make window disappear
- window.Hide(), UnHide() - Hides a window
- window.CurrentLocation() - Returns current window location
- window.Size = w,h - Forces a window to be a particular size. Note this is a property not a method
- window.Size - Tuple (w,h)The size of the current window. Note this is a property
- window.Minimize() - Minimizes window to taskbar
- ## Window Methods
- There are a number of operations you can do on a window after you've created the window. You call these after creating your Windows object.
- #### Layout(rows)
- Call to set the window layout. Must be called prior to Read. Most likely "chained" in line with the Window creation.
- ```python
- window = sg.Window('My window title', layout)
- ```
- #### Finalize()
- Call to force a window to go through the final stages of initialization. This will cause the tkinter resources to be allocated so that they can then be modified. This also causes your window to appear. If you do not want your window to appear when Finalize is called, then set the Alpha to 0 in your window's creation parameters.
- If you want to call an element's Update method or call a Graph element's drawing primitives, you ***must*** either call `Read` or `Finalize` prior to making those calls.
- #### Read(timeout=None, timeout_key='__TIMEOUT_ _ ')
- Read the Window's input values and button clicks in a blocking-fashion
- Returns event, values. Adding a timeout can be achieved by setting timeout=number of milliseconds before the Read times out after which a "timeout event" is returned. The value of timeout_key will be returned as the event. If you do not specify a timeout key, then the value `TIMEOUT_KEY` will be returned.
- If you set the timeout = 0, then the Read will immediately return rather than waiting for input or for a timeout. This is the same as the old ReadNonBlocking call.
- #### ReadNonBlocking() (NO LONGER USED)
- While this call will technically still work, it is being removed. If you want to get the same result, call Read with timeout = 0.
- Read the Window's input values and button clicks but without blocking. It will immediately return. **Consider using Read with non-zero timeout instead!**
- Will consume 100% of your CPU if you do not have other blocking calls in your event loop.
- |name|meaning|
- |-|-|
- | `Refresh() ` | Cause changes to the window to be displayed on the screen. Normally not needed unless the changes are immediately required or if it's going to be a while before another call to Read. |
- | `SetIcon(icon, pngbase64) ` | Sets the window's icon that will be shown on the titlebar. Can either be a filename or a base64 string.|
- | `Fill(values_dict) ` | Populates the windows fields with the values shown in the dictionary.|
- | `FindElementWithFocus() ` | Returns the Element that currently has the focus. Returns None if no Elements were found.|
- | `SaveToDisk(filename) ` | Saves the window's values to disk |
- | `LoadFromDisk(filename) ` | Fills in a window's fields based on previously saved file |
- | `GetScreenDimensions() ` | Returns the size (w,h) of the screen in pixels |
- | `CurrentLocation() ` | Returns current screen position (x,y) |
- | `Move(x, y) ` | Move window to (x,y) position on the screen |
- | `Minimize() ` | Sends the window to the taskbar |
- | `Close() ` | Closes a window, blocking or non-blocking|
- | `Disable() ` | Stops a window from responding until Enable is called|
- | `Enable() ` | Re-enables a previously disabled window|
- | `Hide() ` | Completely hides a window, including removing from the taskbar|
- | `UnHide() ` | Restores a window hidden using Hide|
- | `Disappear() ` | Makes a window disappear while leaving the icon on the taskbar|
- | `Reappear() ` | Makes a window reappear that was previously made to disappear using Disappear()|
- | `SetAlpha(alpha)` | Sets the window's transparency. 0 is completely transparent. 1 is fully visible, normal . Can also use the property Window.AlphaChannel instead of method function call|
- | CloseNonBlocking()<br>(NO LONGER USED.<br> use Close instead) | Closes a non-blocking window |
- | FindElement(key, silent_on_error=False) (shorthand version <br> Element) | Returns the Element that has a matching key. If the key is not found, an Error Element is returned so that the program will not crash should the user try to perform an "update". A Popup message will be shown |
- |||
- # Elements
- "Elements" are the building blocks used to create windows. Some GUI APIs use the term "Widget" to describe these graphic elements.
- - Text
- - Single Line Input
- - Buttons including these types:
- - File Browse
- - Folder Browse
- - Calendar picker
- - Date Chooser
- - Read window
- - Close window ("Button" & all shortcut buttons)
- - Realtime
- - Checkboxes
- - Radio Buttons
- - Listbox
- - Slider
- - Multi-line Text Input/Output
- - Multi-line Text Output (Qt only)
- - Scroll-able Output
- - Vertical Separator
- - Progress Bar
- - Option Menu
- - Menu
- - ButtonMenu
- - Frame
- - Column
- - Graph
- - Image
- - Table
- - Tree
- - Tab, TabGroup
- - StatusBar
- - Pane
- - Stretch (Qt only)
- ## Common Element Parameters
- Some parameters that you will see on almost all Elements are:
- - key - Used with window.FindElement and with return values
- - tooltip - Hover your mouse over the elemnt and you'll get a popup with this text
- - size - (width, height) - usually measured in characters-wide, rows-high. Sometimes they mean pixels
- - font - specifies the font family, size, etc
- - colors - Color name or #RRGGBB string
- - pad - Amount of padding to put around element
- - enable_events - Turns on the element specific events
- #### Tooltip
- Tooltips are text boxes that popup next to an element if you hold your mouse over the top of it. If you want to be extra kind to your window's user, then you can create tooltips for them by setting the parameter `tooltip` to some text string. You will need to supply your own line breaks / text wrapping. If you don't want to manually add them, then take a look at the standard library package `textwrap`.
- Tooltips are one of those "polish" items that really dress-up a GUI and show's a level of sophistication. Go ahead, impress people, throw some tooltips into your GUI.
- #### Size
- Specifies the amount of room reserved for the Element. For elements that are character based, such a Text, it is (# characters, # rows). Sometimes it is a pixel measurement such as the Image element. And sometimes a mix like on the Slider element (characters long by pixels wide).
- #### Colors
- A string representing color. Anytime colors are involved, you can specify the tkinter color name such as 'lightblue' or an RGB hex value '#RRGGBB'. For buttons, the color parameter is a tuple (text color, background color)
- #### Pad
- The amount of room around the element in pixels. The default value is (5,3) which means leave 5 pixels on each side of the x-axis and 3 pixels on each side of the y-axis. You can change this on a global basis using a call to SetOptions, or on an element basis.
- If you want more pixels on one side than the other, then you can split the number into 2 number. If you want 200 pixels on the left side, and 3 pixels on the right, the pad would be ((200,3), 3). In this example, only the x-axis is split.
- #### Font
- Specifies the font family, size, and style. Font families on Windows include:
- * Arial
- * Courier
- * Comic,
- * Fixedsys
- * Times
- * Verdana
- * Helvetica (the default I think)
- The fonts will vary from system to system, however, Tk 8.0 automatically maps Courier, Helvetica and Times to their corresponding native family names on all platforms. Also, font families cannot cause a font specification to fail on Tk 8.0 and greater.
- If you wish to leave the font family set to the default, you can put anything not a font name as the family. The PySimpleGUI Demo programs and documentation use the family 'Any' to demonstrate this fact.. You could use "default" if that's more clear to you.
- There are 2 formats that can be used to specify a font... a string, and a tuple
- Tuple - (family, size, styles)
- String - "Family Size Styles"
- To specify an underlined, Helvetica font with a size of 15 the values:
- ('Helvetica', 15, 'underline italics')
- 'Helvetica 15 underline italics'
- #### Key
- If you are going to do anything beyond the basic stuff with your GUI, then you need to understand keys.
- Keys are a way for you to "tag" an Element with a value that will be used to identify that element. After you put a key in an element's definition, the values returned from Read will use that key to tell you the value. For example, if you have an input field:
- `Input(key='mykey')`
- And your read looks like this: `event, values = Read()`
- Then to get the input value from the read it would be: `values['mykey']`
- You also use the same key if you want to call Update on an element. Please see the section below on Updates to understand that usage.
- #### Visible
- Beginning in version 3.17 you can create Elements that are initially invisible that you can later make visible.
- To create an invisible Element, place the element in the layout like you normally would and add the parameter `visible=False`.
- Later when you want to make that Element visible you simply call the Element's `Update` method and pass in the parameter `visible=True`
- This feature works best on Qt, but does work on the tkinter version as well. The visible parameter can also be used with the Column and Frame "container" Elements.
- ### Output Elements
- Building a window is simply making lists of Elements. Each list is a row in the overall GUI dialog box. The definition looks something like this:
- ```
- layout = [ [row 1 element, row 1 element],
- [row 2 element, row 2 element, row 2 element] ]
- ```
- The code is a crude representation of the GUI, laid out in text.
- ## Shortcut Functions / Multiple Function Names
- Many of the main method calls and Element names have shortcuts. This enables you to code much quicker once you are used to using the SDK. The Text Element, for example, has 3 different names `Text`, `Txt` or`T`. InputText can also be written `Input` or `In` . `FindElement` was recently renamed to `Element` because it's a commonly used function.
- <!-- %!% -->
- ## Text Element
- ```
- layout = [[sg.Text('This is what a Text Element looks like')]]
- ```
- 
- The most basic element is the Text element. It simply displays text. Many of the 'options' that can be set for a Text element are shared by other elements.
- <!-- <+Text+> -->
- <!--
- ```python
- Text(text,
- size=(None, None),
- auto_size_text=None,
- click_submits=False,
- enable_events=False,
- relief=None,
- font=None,
- text_color=None,
- background_color=None,
- justification=None,
- pad=None,
- key=None,
- right_click_menu=None,
- tooltip=None,
- visible=True)
- ```
- Text - The text that's displayed
- size - Element's size
- click_submits - if clicked will cause a read call to return the key value of the button
- enable_events - same as click_submits
- relief - relief to use around the text
- auto_size_text - Bool. Change width to match size of text
- font - Font name and size to use
- text_color - text color
- background_color - background color
- justification - Justification for the text. String - 'left', 'right', 'center'
- pad - (x,y) amount of padding in pixels to use around element when packing
- key - used to identify element. This value will return as button if click_submits True
- right_click_menu - menu definition to display if right clicked
- tooltip - string representing tooltip
- -->
- Some commonly used elements have 'shorthand' versions of the functions to make the code more compact. The functions `T` and `Txt` are the same as calling `Text`.
- ### Fonts
- Already discussed in the common parameters section. Either string or a tuple.
- ### Color in PySimpleGUI are in one of two formats - color name or RGB value.
- Individual colors are specified using either the color names as defined in tkinter or an RGB string of this format:
- "#RRGGBB" or "darkblue"
- ### `auto_size_text `
- A `True` value for `auto_size_text`, when placed on Text Elements, indicates that the width of the Element should be shrunk do the width of the text. The default setting is True.
- ### Chortcut functions
- The shorthand functions for `Text` are `Txt` and `T`
- ### Events `enable_events`
- If you set the parameter `enable_events` or `click_submits` then you will get an event if the user clicks on the Text.
- ### Text Methods
- #### Update
- If you want to change the text, font, or colors after the element has been created, then use the `Update` method.
- <!-- <+Text methods+> -->
- ```python
- Update(value = None, background_color=None, text_color=None, font=None, visible=None)
- ```
- | name | meaning |
- | - | - |
- | value | new value to set text element to |
- | background_color | new background color |
- | text_color | text color to display |
- | font | font to use to display |
- | visible | visibility |
- | | |
- <!-- %!% -->
- ## Multiline Element
- layout = [[sg.Multiline('This is what a Multi-line Text Element looks like', size=(45,5))]]
- 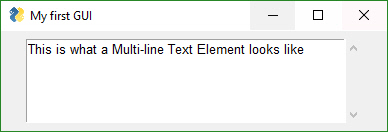
- This Element doubles as both an input and output Element.
- <!-- <+Multiline+> -->
- <!--
- ```python
- Multiline(default_text='',
- enter_submits=False,
- disabled=False,
- autoscroll=False,
- size=(None, None),
- auto_size_text=None,
- background_color=None,
- text_color=None,
- change_submits=False,
- enable_events=False,
- do_not_clear=False,
- key=None,
- focus=False,
- font=None,
- pad=None,
- tooltip=None
- right_click_menu=None,
- visible=True)
- ```
- |name|meaning|
- |-|-|
- | default_text | Text to display in the text box |
- | change_submits | Bool. If True, pressing Enter key submits window |
- | anable_events | Bool. same as change_submits|
- | autoscroll | Bool. Causes "cursor" to always be at the end of the text |
- | size | Element's size |
- | right_click_menu | menu definition to displat if right clicked |
- | auto_size_text | Bool. Change width to match size of text |
- ||| -->
- ### Multiline Methods
- <!-- <+Multiline methods+> -->
- ```python
- Update(value=None,
- disabled=None,
- append=False,
- font=None,
- text_color=None,
- background_color=None)
- Update(self, value=None, disabled=None, append=False, font=None, text_color=None, background_color=None)value=None, disabled=None, append=False):
- ```
- |name|meaning|
- |-|-|
- | value | string to set the text field to|
- | disabled | set to True to disable the element|
- | append | rather than replacing the current text with new text, add the new text onto the end|
- |||
- <!-- %!% -->
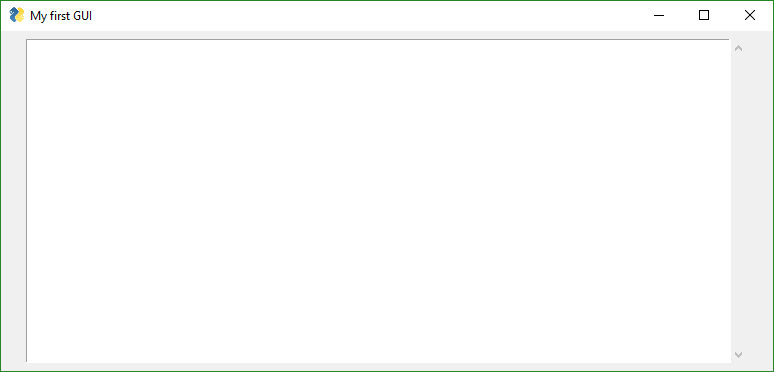
- ## Output Element
- Output re-routes `Stdout` to a scrolled text box.
- Whatever you print will show up in this window.
- Note that you will NOT see what you print until you call either window.Read or window.Refresh. If you want to immediately see what was printed, call window.Refresh() immediately after your print statement.
- ```python
- layout = [[sg.Output(size=(80,10)]]
- ```
- 
- <!-- <+Output+> -->
- <!--
- ```python
- Output(size=(None, None),
- background_color=None,
- text_color=None,
- pad=None,
- font=None,
- tooltip=None,
- right_click_menu=None,
- key=None,
- visible=True)
- ```
- size - Size of Output Element (width, height) in characters
- You should be quite familiar with these parameters by now. If not, read able another element or read about common parameters.
- -->
- ## Input Elements
- These make up the majority of the window definition. Optional variables at the Element level override the window level values (e.g. `size` is specified in the Element). All input Elements create an entry in the list of return values. A Text Input Element creates a string in the list of items returned.
- ## Text Input Element Shortcuts (Input, In)
- ```python
- layout = [[sg.InputText('Default text')]]
- ```
- 
- <!-- <+InputText+> -->
- <!--
- ```python
- def InputText(default_text ='',
- size=(None, None),
- disabled=False,
- auto_size_text=None,
- password_char='',
- justification=None,
- background_color=None,
- text_color=None,
- font=None,
- tooltip=None,
- change_submits=False
- do_not_clear=False,
- key=None,
- focus=False,
- right_click_menu=None,
- pad=None,
- vitible=True):
- ```
- .
- |name|meaning|
- |-|-|
- | default_text | str. Text initially shown in the input box |
- | size | (width, height) of element in characters |
- | auto_size_text | Bool. True is element should be sized to fit text |
- | disabled | Bool. If True the input is disabled |
- | password_char | Character that will be used to replace each entered character. Setting to a value indicates this field is a password entry field |
- | background_color | color to use for the input field background |
- | text_color | color to use for the typed text |
- | font | font used for the element|
- | tooltip | what is shown when hovered over element (doesn't appear to work)|
- | change_submits | if True, will cause a Window.Read to return if a button fills in the value|
- | do_not_clear | Bool. Normally windows clear when read, turn off clearing with this flag. |
- | key | Dictionary key to use for return values |
- | focus | Bool. True if this field should capture the focus (moves cursor to this field) |
- | pad | amount of room in pixels to leave around the element|
- |||
- -->
- There are two methods that can be called:
- ```
- Input.Update(new_Value) - sets the input to new_value
- Input.Get() - returns the current value of the field.
- ```
- Shorthand functions that are equivalent to `InputText` are `Input` and `In`
- #### do_not_clear Parameter
- **Important** - This trips a lot of people up. If you do not set the `do_not_clear` parameter then the input field will clear when an event takes place. The behavior is a "forms" style window development. The assumption is that you want the field to clear. If you are writing a chat program then you're thankful. The rest of you, I'm sorry.
- ### TextInput Methods
- ```python
- Update(value=None, disabled=None):
- Get()
- ```
- |name|meaning|
- |-|-|
- | Update | Change the Element |
- | value | new value to display in field |
- | disabled | if True will disable the element |
- | Get | Returns the current value for the element (you can get also from a call to Read) |
- |||
- <!-- %!% -->
- ## Combo Element
- Also known as a drop-down list. Only required parameter is the list of choices. The return value is a string matching what's visible on the GUI.
- ```python
- layout = [[sg.InputCombo(['choice 1', 'choice 2'])]]
- ```
- 
- <!-- <+Combo+> -->
- <!--
- ```
- InputCombo(values,
- default_value=None
- size=(None, None)
- auto_size_text=None
- background_color=None
- text_color=None
- change_submits=False
- enable_events=False
- readonly=True
- disabled=False
- key=None
- pad=None
- tooltip=None
- visible=True)
- ```
- |name|meaning|
- |-|-|
- | values | Choices to be displayed. List of strings |
- | default_value | which value should be initially chosen |
- | size | (width, height) of element in characters |
- | auto_size_text | Bool. True if size should fit the text length |
- | background_color | color to use for the input field background |
- | text_color | color to use for the typed text |
- | change_submits | Bool. If set causes Read to immediately return if the selected value changes |
- | disabled | Bool. If set will disable changes |
- | readonly | Bool. If set user cannot change the values to choose from |
- | key | Dictionary key to use for return values |
- | pad | (x,y) Amount of padding to put around element in pixels |
- | tooltip | Text string. If set, hovering over field will popup the text |
- -->
- Shortcut functions - Combo, DropDown, Drop
- ### Combo Methods
- ```python
- Update(value=None, values=None, set_to_index=None, disabled=None, readonly=None)
- ```
- value - change which value is current selected
- values - change list of choices
- set_to_index - change selection to a particular choice
- disable - if True will disable element
- readonly - if True will make element readonly
- <!-- %!% -->
- ## Listbox Element
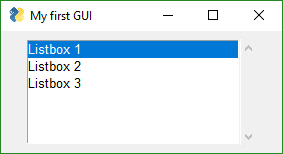
- The standard listbox like you'll find in most GUIs. Note that the return values from this element will be a ***list of results, not a single result***. This is because the user can select more than 1 item from the list (if you set the right mode).
- ```python
- layout = [[sg.Listbox(values=['Listbox 1', 'Listbox 2', 'Listbox 3'], size=(30, 6))]]
- ```
- 
- <!-- <+Listbox+> -->
- <!--
- ```
- Listbox(values
- default_values=None
- select_mode=None
- change_submits=False
- bind_return_key=False
- size=(None, None)
- disabled = False,
- auto_size_text=None
- font=None
- background_color=None
- text_color=None
- key=None
- pad=None
- right_click_menu=None
- tooltip=None,
- visible=True):
- ```
- - values - Choices to be displayed. List of strings
- - select_mode - Defines how to list is to operate.
- - Choices include constants or strings:
- - Constants version:
- - LISTBOX_SELECT_MODE_BROWSE
- - LISTBOX_SELECT_MODE_EXTENDED
- - LISTBOX_SELECT_MODE_MULTIPLE
- - LISTBOX_SELECT_MODE_SINGLE - the default
- - Strings version:
- - 'browse'
- - 'extended'
- - 'multiple'
- - 'single'
- - change_submits - if True, the window read will return with a button value of ''
- - bind_return_key - if the focus is on the listbox and the user presses return key, or if the user double clicks an item, then the read will return
- - size - (width, height) of element in characters
- - disapled - Bool. If True element is disabled
- - auto_size_text - Bool. True if size should fit the text length
- - background_color - color to use for the input field background
- - font - font to use for items in list
- - text_color - color to use for the typed text
- - key - Dictionary key to use for return values and to find element
- - pad - amount of padding to use when packing
- - tooltip - tooltip text -->
- The `select_mode` option can be a string or a constant value defined as a variable. Generally speaking strings are used for these kinds of options.
- ListBoxes can cause a window to return from a Read call. If the flag change_submits is set, then when a user makes a selection, the Read immediately returns.
- Another way ListBoxes can cause Reads to return is if the flag bind_return_key is set. If True, then if the user presses the return key while an entry is selected, then the Read returns. Also, if this flag is set, if the user double-clicks an entry it will return from the Read.
- ### Listbox Methods
- ```python
- Update(values=None, disabled=None)
- SetValue(values)
- GetListValues()
- ```
- |name|meaning|
- |-|-|
- | Update | Change element |
- | values | new list of choices |
- | disabled | if True disables the element |
- | SetValue | Sets selection to one or more values |
- | GetListValues | Return the list of values to choose from |
- |||
- <!-- %!% -->
- ## Slider Element
- Sliders have a couple of slider-specific settings as well as appearance settings. Examples include the `orientation` and `range` settings.
- layout = [[sg.Slider(range=(1,500), default_value=222, size=(20,15), orientation='horizontal', font=('Helvetica', 12))]]
- 
- <!-- <+Slider+> -->
- <!--
- Slider(range=(None,None),
- default_value=None,
- resolution=None,
- orientation=None,
- border_width=None,
- relief=None,
- change_submits=False,
- disabled=False,
- size=(None, None),
- font=None,
- background_color=None,
- text_color=None,
- key=None,
- pad=None,
- tooltip=None,
- visible=True)
- range - (min, max) slider's range
- default_value - default setting (within range)
- resolution - how much each 'tick' should represent. Default = 1
- orientation - 'horizontal' or 'vertical' ('h' or 'v' work)
- border_width - how deep the widget looks
- relief - relief style. Values are same as progress meter relief values. Can be a constant or a string:
- - RELIEF_RAISED= 'raised'
- - RELIEF_SUNKEN= 'sunken'
- - RELIEF_FLAT= 'flat'
- - RELIEF_RIDGE= 'ridge'
- - RELIEF_GROOVE= 'groove'
- - RELIEF_SOLID = 'solid'
- size - (width, height) of element in characters
- disabled - Bool If True slider is disabled
- auto_size_text - Bool. True if size should fit the text
- background_color - color to use for the input field background
- text_color - color to use for the typed text
- change_submits - causes window read to immediately return if the checkbox value changes
- key- Dictionary key to use for return values
- tooltip - Tooltip to display when hovered over wlement
- -->
- ### Qt Sliders
- There is an important difference between Qt and tkinter sliders. On Qt, the slider values must be integer, not float. If you want your slider to go from 0.1 to 1.0, then make your slider go from 1 to 10 and divide by 10. It's an easy math thing to do and not a big deal. Just deal with it.... you're writing software after all. Presumably you know how to do these things. ;-)
- ### Slider Methods
- ```python
- Update(self, value=None, range=(None, None), disabled=None, visible=None):
- ```
- value - set current selection to value
- range - change range of valid values
- disabled - if True disables element
- <!-- %!% -->
- ## Radio Element
- Creates one radio button that is assigned to a group of radio buttons. Only 1 of the buttons in the group can be selected at any one time.
- ```python
- layout = [
- [sg.Radio('My first Radio!', "RADIO1", default=True),
- sg.Radio('My second radio!', "RADIO1")]
- ]
- ```
- 
- <!-- <+Radio+> -->
- <!--
- Radio(text,
- group_id,
- default=False,
- size=(None, None),
- disabled = False,
- auto_size_text=None,
- font=None,
- background_color = None,
- text_color = None,
- key = None,
- pad = None,
- tooltip = None,
- visible=True)
- |name|meaning|
- |-|-|
- | text| Text to display next to button|
- | group_id| Groups together multiple Radio Buttons. Can be any value|
- | default| Bool. Initial state|
- | size| (width, height) size of element in characters|
- | auto_size_text| Bool. True if should size width to fit text|
- | font| Font type and size for text display|
- | background_color| color to use for the background|
- | text_color| color to use for the text|
- | key| Dictionary key to use for return values|
- | pad| padding around element|
- | tooltip| tooltip to show when mouse hovered over element|
- |||
- -->
- ### Radio Button Methods
- ```python
- Update(value=None, disabled=None, visible=None)
- ```
- |name|meaning|
- |-|-|
- | value | Bool. if True change to selected |
- | disabled | if True disables the element |
- |||
- <!-- %!% -->
- ## Checkbox Element
- Checkbox elements are like Radio Button elements. They return a bool indicating whether or not they are checked.
- layout = [[sg.Checkbox('My first Checkbox!', default=True), sg.Checkbox('My second Checkbox!')]]
- 
- <!-- <+Checkbox+> -->
- <!-- Checkbox(text,
- default=False,
- size=(None, None),
- auto_size_text=None,
- font=None,
- background_color = None,
- text_color = None,
- change_submits = False
- disabled = False,
- key = None,
- pad = None,
- tooltip = None,
- visible=True):
- | text | Text to display next to checkbox |
- | default | Bool + None. Initial state. True = Checked, False = unchecked, None = Not available (grayed out) |
- | size | (width, height) size of element in characters |
- | auto_size_text | Bool. True if should size width to fit text |
- | disabled | Bool. If True element is disabled |
- | font | Font type and size for text display |
- | background_color | color to use for the background |
- | text_color | color to use for the typed text |
- | change_submits | causes window read to immediately return if the checkbox value changes |
- | key | Dictionary key to use for return values |
- | pad | Padding around element in window |
- | tooltip | text to show when mouse is hovered over element |
- -->
- Shortcut functions - CBox, CB, Check
- ### Checkbox Methods
- ```python
- Update(value=None, disabled=None, visible=None)
- Get()
- ```
- |name|meaning|
- |-|-|
- | Update| changes the element|
- | value| Bool if True checks the checkbox|
- | disabled| if True disables the element|
- | Get| returns current state|
- |||
- <!-- %!% -->
- ## Spin Element
- An up/down spinner control. The valid values are passed in as a list.
- layout = [[sg.Spin([i for i in range(1,11)], initial_value=1), sg.Text('Volume level')]]
- 
- <!-- <+Spin+> -->
- <!--
- Spin(values,
- intiial_value=None,
- disabled = False,
- size=(None, None),
- change_submits = False,
- auto_size_text=None,
- font=None,
- background_color = None,
- text_color = None,
- key = None.
- pad = None,
- tooltip = None,
- visible=True):
- Parameter definitions
- values - List of valid values
- initial_value - String with initial value
- size - (width, height) size of element in characters
- auto_size_text - Bool. True if should size width to fit text
- font - Font type and size for text display
- disabled - Bool. If True element is disabled
- background_color - color to use for the background
- text_color - color to use for the typed text
- change_submits - causes window read to immediately return if the spinner value changes
- key = Dictionary key to use for return values
- pad - padding around element in the window
- tooltip - text to show when mouse hovered over element -->
- ### Qt Differences - `values` is a range!
- Note that Qt does not allow arbitrary spinner values. With PySimpleGUI-tkinter you can have any values in your list. In Qt they must be integers. Yea, it kinda sucks. I'm working on it.
- On Qt values is a tuple representing a range. On plain PySimpleGUI this value is a list of items. Make sure on the plain version you specify items as a list using [] and not a generator using ().
- ### Spin Methods
- ```python
- Update(value=None, values=None, disabled=None, visible=None)
- ```
- value - set the current value
- values - set available choices
- disabled - if True disables the element
- <!-- %!% -->
- ## Image Element
- Images can be placed in your window provide they are in PNG, GIF, PPM/PGM format. JPGs cannot be shown because tkinter does not naively support JPGs. You can use the Python Imaging Library (PIL) package to convert your image to PNG prior to calling PySimpleGUI if your images are in JPG format.
- <!-- <+Image+> -->
- <!--
- ```python
- Image(filename=None,
- data=None,
- data_base64=None,
- background_color=None,
- size=(None,None),
- pad=None,
- key=None,
- tooltip=None,
- click_submits=False,
- enable_events=False,
- visible=True,
- right_click_menu=None,
- size_px=(None,None)
- visible=True)
- ```
- Parameter definitions
- filename - file name if the image is in a file
- data - if image is in RAM (PIL format?)
- data_base64 - image in base64 format
- background_color - Color of background
- size - Size (Width, Height) of image in pixels
- pad - Padding around Element in the window
- key - Key used to find the element
- tooltip - text to show when mouse if hovered over image
- click_submits, enable_events - if True returns event when image is clicked
- visible - if False will create image as hidden
- size_px - size of image in pixels
- -->
- ### `Update` Method
- Like other Elements, the Image Element has an `Update` method. Call Update if you want to change the image.
- def Update(self, filename=None, data=None, visible=None):
- Choose **either** a filename or in-ram data image to use to replace current image
- ### `UpdateAnimation` Method for Animated GIFs
- 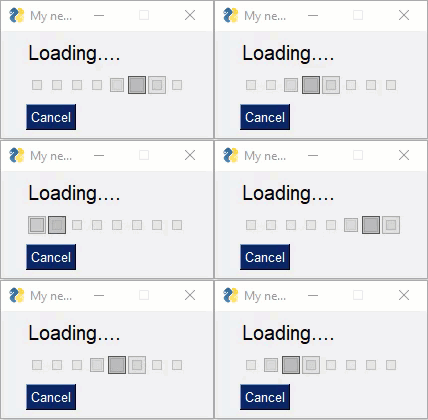
- Starting in version 3.23 you can specify an animated GIF as an image and can animate the GIF by calling `UpdateAnimation`. Exciting stuff!
- ```python
- UpdateAnimation(source,
- time_between_frames=0)
- ```
- `source` can be a filename ***or*** a base64 bytes variable (unlike other calls that split out the filename parameter and base64 parameter into 2 parameters.
- `time_between_frames` is an optional parameter. It will keep track of the amount of time between frame changes for you to give you a smooth animation. With this parameter you can call the function as often as you want and it will advance to the next frame only after the correct amount of time has lapsed.
- You can call the method without setting the `time_between_frames` value and it will show a frame and immediately move on to the next frame. This enables you to do the inter-frame timing.
- <!-- %!% -->
- ## Button Element
- **MAC USERS** - Macs suck when it comes to tkinter and button colors. It sucks so badly with colors that the `LookAndFeel` call is disabled. You cannot change button colors for Macs. You're stuck with the system default color if you are using the tkinter version of PySimpleGUI. The Qt version does not have this issue.
- Buttons are the most important element of all! They cause the majority of the action to happen. After all, it's a button press that will get you out of a window, whether it be Submit or Cancel, one way or another a button is involved in all windows. The only exception is to this is when the user closes the window using the "X" in the upper corner which means no button was involved.
- The Types of buttons include:
- * Folder Browse
- * File Browse
- * Files Browse
- * File SaveAs
- * File Save
- * Close window (normal button)
- * Read window
- * Realtime
- * Calendar Chooser
- * Color Chooser
- Close window - Normal buttons like Submit, Cancel, Yes, No, do NOT close the window... they used to. Now to close a window you need to use a CloseButton / CButton.
- Folder Browse - When clicked a folder browse dialog box is opened. The results of the Folder Browse dialog box are written into one of the input fields of the window.
- File Browse - Same as the Folder Browse except rather than choosing a folder, a single file is chosen.
- Calendar Chooser - Opens a graphical calendar to select a date.
- Color Chooser - Opens a color chooser dialog
- Read window - This is a window button that will read a snapshot of all of the input fields, but does not close the window after it's clicked.
- Realtime - This is another async window button. Normal button clicks occur after a button's click is released. Realtime buttons report a click the entire time the button is held down.
- Most programs will use a combination of shortcut button calls (Submit, Cancel, etc), normal Buttons which leave the windows open and CloseButtons that close the window when clicked.
- Sometimes there are multiple names for the same function. This is simply to make the job of the programmer quicker and easier. Or they are old names that are no longer used but kept around so that existing programs don't break.
- The 4 primary windows of PySimpleGUI buttons and their names are:
- 1. `Button`= `ReadButton` = `RButton` = `ReadFormButton` (old style... use Button instead)
- 2. `CloseButton` = `CButton`
- 3. `RealtimeButton`
- 4. `DummyButton`
- You will find the long-form names in the older programs. ReadButton for example.
- In Oct 2018, the definition of Button changed. Previously Button would CLOSE the window when clicked. It has been changed so the Button calls will leave the window open in exactly the same way as a ReadButton. They are the same calls now. To enables windows to be closed using buttons, a new button was added... `CloseButton` or `CButton`.
- The most basic Button element call to use is `Button`
- <!-- <+Button+> -->
- <!-- Button(button_text=''
- button_type=BUTTON_TYPE_CLOSES_WIN
- target=(None, None)
- tooltip=None
- file_types=(("ALL Files", "*.*"),)
- initial_folder=None
- disabled = False
- image_filename=None
- image_data=None
- image_size=(None, None)
- image_subsample=None
- border_width=None
- size=(None, None)
- auto_size_button=None
- button_color=None
- default_value = None
- font=None
- bind_return_key=False
- focus=False
- pad=None
- key=None,
- visible=True):
- Parameters
- button_text - Text to be displayed on the button
- button_type - You should NOT be setting this directly
- target - key or (row,col) target for the button
- tooltip - tooltip text for the button
- file_types - the filetypes that will be used to match files
- initial_folder - starting path for folders and files
- disabled = Bool If True button is disabled
- image_filename - image filename if there is a button image
- image_data - in-RAM image to be displayed on button
- image_size - size of button image in pixels
- image_subsample - amount to reduce the size of the image
- border_width - width of border around button in pixels
- size - size in characters
- auto_size_button - True if button size is determined by button text
- button_color - (text color, backound color)
- default_value - initial value for buttons that hold information
- font - font to use for button text
- bind_return_key - If True the return key will cause this button to fire
- focus - if focus should be set to this button
- pad - (x,y) padding in pixels for packing the button
- key - key used for finding the element
- -->
- ### Shortcut, Pre-defined Buttons
- These Pre-made buttons are some of the most important elements of all because they are used so much. They all basically do the same thing, set the button text to match the function name and set the parameters to commonly used values. If you find yourself needing to create a custom button often because it's not on this list, please post a request on GitHub. . They include:
- OK
- Ok
- Submit
- Cancel
- Yes
- No
- Exit
- Quit
- Help
- Save
- SaveAs
- FileBrowse
- FilesBrowse
- FileSaveAs
- FolderBrowse
- **IMPORT NOTE ABOUT SHORTCUT BUTTONS**
- Prior to release 3.11.0, these buttons closed the window. Starting with 3.11 they will not close the window. They act like RButtons (return the button text and do not close the window)
- If you are having trouble with these buttons closing your window, please check your installed version of PySimpleGUI by typing `pip list` at a command prompt. Prior to 3.11 these buttons close your window.
- Using older versions, if you want a Submit() button that does not close the window, then you would instead use RButton('Submit'). Using the new version, if you want a Submit button that closes the window like the sold Submit() call did, you would write that as `CloseButton('Submit')` or `CButton('Submit')`
- layout = [[sg.OK(), sg.Cancel()]]
- 
- ### Button targets
- The `FileBrowse`, `FolderBrowse`, `FileSaveAs` , `FilesSaveAs`, `CalendarButton`, `ColorChooserButton` buttons all fill-in values into another element located on the window. The target can be a Text Element or an InputText Element. The location of the element is specified by the `target` variable in the function call.
- The Target comes in two forms.
- 1. Key
- 2. (row, column)
- Targets that are specified using a key will find its target element by using the target's key value. This is the "preferred" method.
- If the Target is specified using (row, column) then it utilizes a grid system. The rows in your GUI are numbered starting with 0. The target can be specified as a hard coded grid item or it can be relative to the button.
- The (row, col) targeting can only target elements that are in the same "container". Containers are the Window, Column and Frame Elements. A File Browse button located inside of a Column is unable to target elements outside of that Column.
- The default value for `target` is `(ThisRow, -1)`. `ThisRow` is a special value that tells the GUI to use the same row as the button. The Y-value of -1 means the field one value to the left of the button. For a File or Folder Browse button, the field that it fills are generally to the left of the button is most cases. (ThisRow, -1) means the Element to the left of the button, on the same row.
- If a value of `(None, None)` is chosen for the target, then the button itself will hold the information. Later the button can be queried for the value by using the button's key.
- Let's examine this window as an example:
- 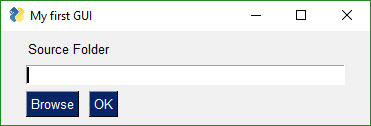
- The `InputText` element is located at (1,0)... row 1, column 0. The `Browse` button is located at position (2,0). The Target for the button could be any of these values:
- Target = (1,0)
- Target = (-1,0)
- The code for the entire window could be:
- layout = [[sg.T('Source Folder')],
- [sg.In()],
- [sg.FolderBrowse(target=(-1, 0)), sg.OK()]]
- or if using keys, then the code would be:
- layout = [[sg.T('Source Folder')],
- [sg.In(key='input')],
- [sg.FolderBrowse(target='input'), sg.OK()]]
- See how much easier the key method is?
- **Save & Open Buttons**
- There are 4 different types of File/Folder open dialog box available. If you are looking for a file to open, the `FileBrowse` is what you want. If you want to save a file, `SaveAs` is the button. If you want to get a folder name, then `FolderBrowse` is the button to use. To open several files at once, use the `FilesBrowse` button. It will create a list of files that are separated by ';'
- 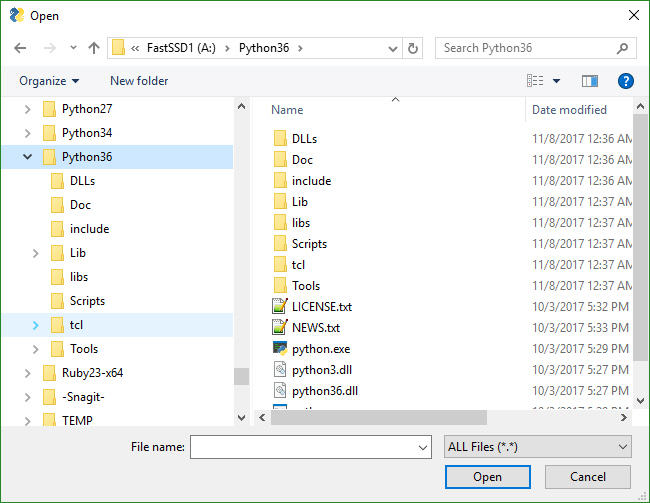
- 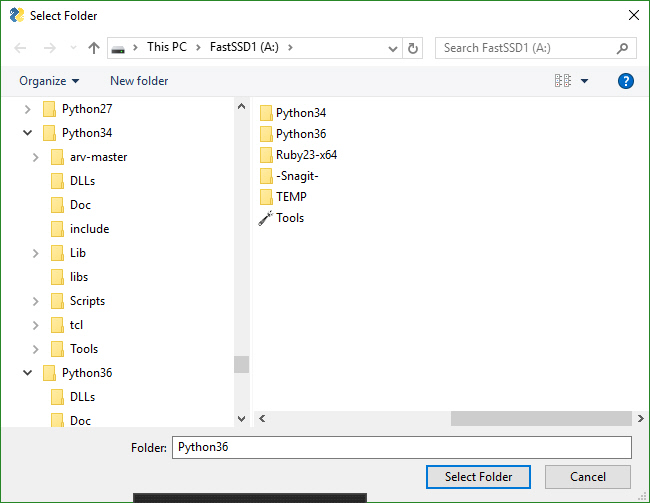
- 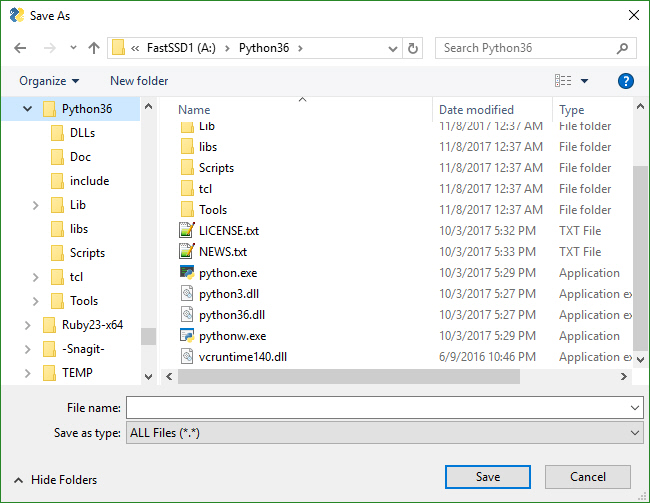
- **Calendar Buttons**
- These buttons pop up a calendar chooser window. The chosen date is returned as a string.
- 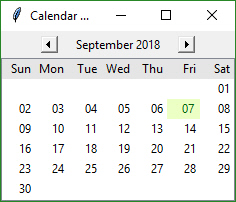
- **Color Chooser Buttons**
- These buttons pop up a standard color chooser window. The result is returned as a tuple. One of the returned values is an RGB hex representation.
- 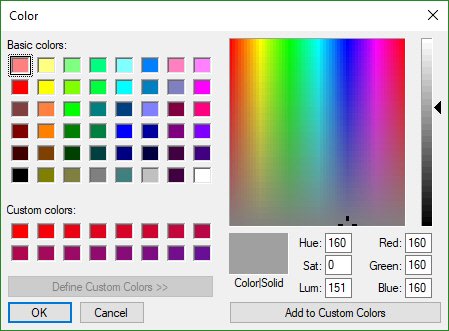
- **Custom Buttons**
- Not all buttons are created equal. A button that closes a window is different that a button that returns from the window without closing it. If you want to define your own button, you will generally do this with the Button Element `Button`, which closes the window when clicked.
- layout = [[sg.Button('My Button')]]
- 
- All buttons can have their text changed by changing the `button_text` variable in the button call. It is this text that is returned when a window is read. This text will be what tells you which button is called so make it unique. Most of the convenience buttons (Submit, Cancel, Yes, etc) are all Buttons. Some that are not are `FileBrowse` , `FolderBrowse`, `FileSaveAs`. They clearly do not close the window. Instead they bring up a file or folder browser dialog box.
- **Button Images**
- Now this is an exciting feature not found in many simplified packages.... images on buttons! You can make a pretty spiffy user interface with the help of a few button images.
- Your button images need to be in PNG or GIF format. When you make a button with an image, set the button background to the same color as the background. There's a button color TRANSPARENT_BUTTON that you can set your button color to in order for it to blend into the background. Note that this value is currently the same as the color as the default system background on Windows. If you want to set the button background color to the current system default, use the value COLOR_SYSTEM_DEFAULT as the background color.
- This example comes from the `Demo Media Player.py` example program. Because it's a non-blocking button, it's defined as `RButton`. You also put images on blocking buttons by using `Button`.
- sg.RButton('Restart Song', button_color=sg.TRANSPARENT_BUTTON,
- image_filename=image_restart, image_size=(50, 50), image_subsample=2, border_width=0)
- Three parameters are used for button images.
- image_filename - Filename. Can be a relative path
- image_size - Size of image file in pixels
- image_subsample - Amount to divide the size by. 2 means your image will be 1/2 the size. 3 means 1/3
- Here's an example window made with button images.
- 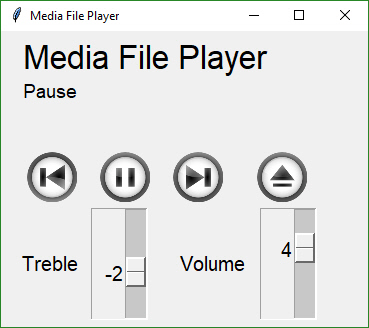
- You'll find the source code in the file Demo Media Player. Here is what the button calls look like to create media player window
- ```python
- sg.RButton('Pause', button_color=sg.TRANSPARENT_BUTTON,
- image_filename=image_pause,
- image_size=(50, 50),
- image_subsample=2,
- border_width=0)
- ```
- This is one you'll have to experiment with at this point. Not up for an exhaustive explanation.
- **Realtime Buttons**
- Normally buttons are considered "clicked" when the mouse button is let UP after a downward click on the button. What about times when you need to read the raw up/down button values. A classic example for this is a robotic remote control. Building a remote control using a GUI is easy enough. One button for each of the directions is a start. Perhaps something like this:
- 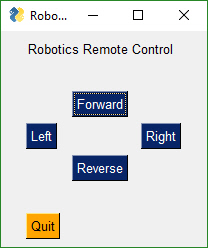
- This window has 2 button types. There's the normal "Read Button" (Quit) and 4 "Realtime Buttons".
- Here is the code to make, show and get results from this window:
- ```python
- import PySimpleGUI as sg
- gui_rows = [[sg.Text('Robotics Remote Control')],
- [sg.T(' ' * 10), sg.RealtimeButton('Forward')],
- [sg.RealtimeButton('Left'), sg.T(' ' * 15), sg.RealtimeButton('Right')],
- [sg.T(' ' * 10), sg.RealtimeButton('Reverse')],
- [sg.T('')],
- [sg.Quit(button_color=('black', 'orange'))]
- ]
- window = sg.Window('Robotics Remote Control', auto_size_text=True).Layout(gui_rows)
- #
- # Some place later in your code...
- # You need to perform a Read or Refresh call on your window every now and then or
- # else it will apprear as if the program has locked up.
- #
- # your program's main loop
- while (True):
- # This is the code that reads and updates your window
- event, values = window.Read(timeout=0)
- if event is not None:
- print(event)
- if event == 'Quit' or values is None:
- break
- window.Close() # Don't forget to close your window!
- ```
- This loop will read button values and print them. When one of the Realtime buttons is clicked, the call to `window.Read` will return a button name matching the name on the button that was depressed or the key if there was a key assigned to the button. It will continue to return values as long as the button remains depressed. Once released, the Read will return timeout events until a button is again clicked.
- **File Types**
- The `FileBrowse` & `SaveAs` buttons have an additional setting named `file_types`. This variable is used to filter the files shown in the file dialog box. The default value for this setting is
- FileTypes=(("ALL Files", "*.*"),)
- This code produces a window where the Browse button only shows files of type .TXT
- layout = [[sg.In() ,sg.FileBrowse(file_types=(("Text Files", "*.txt"),))]]
- NOTE - Mac users will not be able to use the file_types parameter. tkinter has a bug on Macs that will crash the program is a file_type is attempted so that feature had to be removed. Sorry about that!
- ***The ENTER key***
- The ENTER key is an important part of data entry for windows. There's a long tradition of the enter key being used to quickly submit windows. PySimpleGUI implements this by tying the ENTER key to the first button that closes or reads a window.
- The Enter Key can be "bound" to a particular button so that when the key is pressed, it causes the window to return as if the button was clicked. This is done using the `bind_return_key` parameter in the button calls.
- If there are more than 1 button on a window, the FIRST button that is of type Close window or Read window is used. First is determined by scanning the window, top to bottom and left to right.
- ### Button Methods
- ```python
- Update(text=None, button_color=(None, None), disabled=None, image_data=None, image_filename=None, visible=None)
- GetText()
- ```
- Update - Change the button element
- text - sets button text
- button color - (text, background)
- disabled - if True disables the button
- image_data - sets button image to in-ram image
- image_filename - sets button image using a file
- GetText - Returns the current text shown on a button
- <!-- %!% -->
- ## ButtonMenu Element
- The ButtonMenu element produces a unique kind of effect. It's a button, that when clicked, shows you a menu. It's like clicking one of the top-level menu items on a MenuBar. As a result, the menu definition take the format of a single menu entry from a normal menu definition. A normal menu definition is a list of lists. This definition is one of those lists.
- Here is a sample definition:
- ```python
- ['Menu', ['&Pause Graph', 'Menu item::optional_key']]
- ```
- The very first string normally specifies what is shown on the menu bar. In this case, the value is **not used**. You set the text for the button using a different parameter, the `button_text` parm.
- <!-- <+ButtonMenu+> -->
- <!--
- ```python
- ButtonMenu( button_text,
- menu_def,
- tooltip=None,
- disabled=False,
- image_filename=None,
- image_data=None,
- image_size=(None, None),
- image_subsample=None,
- border_width=None,
- size=(None, None),
- auto_size_button=None,
- button_color=None,
- font=None,
- pad=None,
- key=None,
- visible=True,
- size_px=(None,None)):
- ```
- -->
- One use of this element is to make a "fake menu bar" that has a colored background. Normal menu bars cannot have their background color changed. Not so with ButtonMenus.
- This is the effect:
- 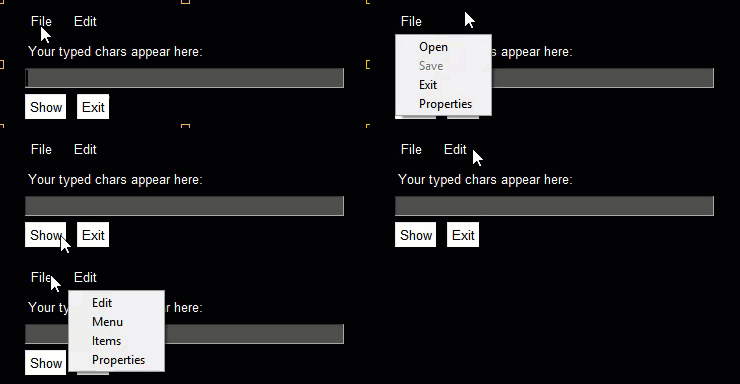
- Return values for ButtonMenus are sent via the return values dictionary. If a selection is made, then an event is generated that will equal the ButtonMenu's key value. Use that key value to look up the value selected by the user. This is the same mechanism as the Menu Bar Element, but differs from the pop-up (right click) menu.
- <!-- %!% -->
- ## VerticalSeparator Element
- This element has limited usefulness and is being included more for completeness than anything else. It will draw a line between elements.
- ```python
- VerticalSeparator(pad=None)
- ```
- 
- It works best when placed between columns or elements that span multiple rows. If on a "normal" row with elements that are only 1 row high, then it will only span that one row.
- <!-- %!% -->
- ## ProgressBar Element
- The `ProgressBar` element is used to build custom Progress Bar windows. It is HIGHLY recommended that you use OneLineProgressMeter that provides a complete progress meter solution for you. Progress Meters are not easy to work with because the windows have to be non-blocking and they are tricky to debug.
- The **easiest** way to get progress meters into your code is to use the `OneLineProgressMeter` API. This consists of a pair of functions, `OneLineProgressMeter` and `OneLineProgressMeterCancel`. You can easily cancel any progress meter by calling it with the current value = max value. This will mark the meter as expired and close the window.
- You've already seen OneLineProgressMeter calls presented earlier in this readme.
- sg.OneLineProgressMeter('My Meter', i+1, 1000, 'key', 'Optional message')
- The return value for `OneLineProgressMeter` is:
- `True` if meter updated correctly
- `False` if user clicked the Cancel button, closed the window, or vale reached the max value.
- #### Progress Mater in Your window
- Another way of using a Progress Meter with PySimpleGUI is to build a custom window with a `ProgressBar` Element in the window. You will need to run your window as a non-blocking window. When you are ready to update your progress bar, you call the `UpdateBar` method for the `ProgressBar` element itself.
- 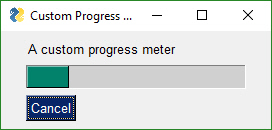
- import PySimpleGUI as sg
- # layout the window
- layout = [[sg.Text('A custom progress meter')],
- [sg.ProgressBar(10000, orientation='h', size=(20, 20), key='progressbar')],
- [sg.Cancel()]]
- # create the window`
- window = sg.Window('Custom Progress Meter').Layout(layout)
- progress_bar = window.FindElement('progressbar')
- # loop that would normally do something useful
- for i in range(10000):
- # check to see if the cancel button was clicked and exit loop if clicked
- event, values = window.Read(timeout=0)
- if event == 'Cancel' or event is None:
- break
- # update bar with loop value +1 so that bar eventually reaches the maximum
- progress_bar.UpdateBar(i + 1)
- # done with loop... need to destroy the window as it's still open
- window.Close())
- #### Output
- The Output Element is a re-direction of Stdout. Anything "printed" will be displayed in this element.
- Output(size=(None, None))
- Here's a complete solution for a chat-window using an Async window with an Output Element
- import PySimpleGUI as sg
- # Blocking window that doesn't close
- def ChatBot():
- layout = [[(sg.Text('This is where standard out is being routed', size=[40, 1]))],
- [sg.Output(size=(80, 20))],
- [sg.Multiline(size=(70, 5), enter_submits=True),
- sg.RButton('SEND', button_color=(sg.YELLOWS[0], sg.BLUES[0])),
- sg.Button('EXIT', button_color=(sg.YELLOWS[0], sg.GREENS[0]))]]
- window = sg.Window('Chat Window', default_element_size=(30, 2)).Layout(layout)
- # ---===--- Loop taking in user input and using it to query HowDoI web oracle --- #
- while True:
- event, value = window.Read()
- if event == 'SEND':
- print(value)
- else:
- break
- ChatBot()
- ### ProgressBar Methods
- ```python
- UpdateBar(current_count, max=None)
- ```
- current_count - sets the current value
- max - changes the max value
- <!-- %!% -->
- ## Column Element
- Starting in version 2.9 you'll be able to do more complex layouts by using the Column Element. Think of a Column as a window within a window. And, yes, you can have a Column within a Column if you want.
- Columns are specified in exactly the same way as a window is, as a list of lists.
- <!-- <+Column+> -->
- <!-- ```python
- Column( layout,
- background_color=None,
- size=(None, None),
- pad=None,
- scrollable=False,
- vertical_scroll_only=False,
- right_click_menu=None,
- key=None,
- visible=True)
- ```
- -->
- Columns are needed when you have an element that has a height > 1 line on the left, with single-line elements on the right. Here's an example of this kind of layout:
- 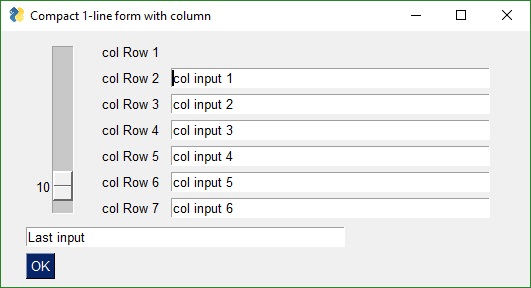
- This code produced the above window.
- import PySimpleGUI as sg
- # Demo of how columns work
- # window has on row 1 a vertical slider followed by a COLUMN with 7 rows
- # Prior to the Column element, this layout was not possible
- # Columns layouts look identical to window layouts, they are a list of lists of elements.
- window = sg.Window('Columns') # blank window
- # Column layout
- col = [[sg.Text('col Row 1')],
- [sg.Text('col Row 2'), sg.Input('col input 1')],
- [sg.Text('col Row 3'), sg.Input('col input 2')],
- [sg.Text('col Row 4'), sg.Input('col input 3')],
- [sg.Text('col Row 5'), sg.Input('col input 4')],
- [sg.Text('col Row 6'), sg.Input('col input 5')],
- [sg.Text('col Row 7'), sg.Input('col input 6')]]
- layout = [[sg.Slider(range=(1,100), default_value=10, orientation='v', size=(8,20)), sg.Column(col)],
- [sg.In('Last input')],
- [sg.OK()]]
- # Display the window and get values
- # If you're willing to not use the "context manager" design pattern, then it's possible
- # to collapse the window display and read down to a single line of code.
- event, values = sg.Window('Compact 1-line window with column').Layout(layout).Read()
- sg.Popup(event, values, line_width=200)
- The Column Element has 1 required parameter and 1 optional (the layout and the background color). Setting the background color has the same effect as setting the window's background color, except it only affects the column rectangle.
- Column(layout, background_color=None)
- The default background color for Columns is the same as the default window background color. If you change the look and feel of the window, the column background will match the window background automatically.
- ----
- ## Frame Element (Labelled Frames, Frames with a title)
- Frames work exactly the same way as Columns. You create layout that is then used to initialize the Frame.
- ```python
- Frame( title,
- layout,
- title_color=None,
- background_color=None,
- title_location=None,
- relief=DEFAULT_FRAME_RELIEF,
- size=(None, None),
- font=None,
- pad=None,
- border_width=None,
- key=None,
- tooltip=None,
- right_click_menu=None,
- visible=True)
- ```
- def Frame(title - the label / title to put on frame
- layout - list of rows of elements the frame contains
- title_color - color of the title text
- background_color - color of background
- title_location - locations to put the title
- relief - type of relief to use
- size - size of Frame in characters. Do not use if you want frame to autosize
- font - font to use for title
- pad - element padding to use when packing
- border_width - how thick the line going around frame should be
- key - key used to location the element
- tooltip - tooltip text
- This code creates a window with a Frame and 2 buttons.
- frame_layout = [
- [sg.T('Text inside of a frame')],
- [sg.CB('Check 1'), sg.CB('Check 2')],
- ]
- layout = [
- [sg.Frame('My Frame Title', frame_layout, font='Any 12', title_color='blue')],
- [sg.Submit(), sg.Cancel()]
- ]
- window = sg.Window('Frame with buttons', font=("Helvetica", 12)).Layout(layout)
- 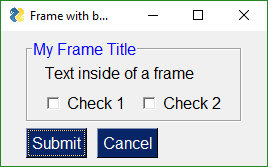
- Notice how the Frame layout looks identical to a window layout. A window works exactly the same way as a Column and a Frame. They all are "container elements". Elements that contain other elements.
- *These container Elements can be nested as deep as you want.* That's a pretty spiffy feature, right? Took a lot of work so be appreciative. Recursive code isn't trivial.
- <!-- %!% -->
- ## Canvas Element
- <!-- <+Canvas+> -->
- <!--
- ```python
- Canvas(canvas=None,
- background_color=None,
- size=(None, None),
- pad=None,
- key=None,
- tooltip=None,
- right_click_menu=None,
- visible=True)
- ```
- -->
- In my opinion, the tkinter Canvas Widget is the most powerful of the tkinter widget. While I try my best to completely isolate the user from anything that is tkinter related, the Canvas Element is the one exception. It enables integration with a number of other packages, often with spectacular results.
- ### Matplotlib, Pyplot Integration
- One such integration is with Matploplib and Pyplot. There is a Demo program written that you can use as a design pattern to get an understanding of how to use the Canvas Widget once you get it.
- def Canvas(canvas - a tkinter canvasf if you created one. Normally not set
- background_color - canvas color
- size - size in pixels
- pad - element padding for packing
- key - key used to lookup element
- tooltip - tooltip text
- The order of operations to obtain a tkinter Canvas Widget is:
- figure_x, figure_y, figure_w, figure_h = fig.bbox.bounds
- # define the window layout
- layout = [[sg.Text('Plot test')],
- [sg.Canvas(size=(figure_w, figure_h), key='canvas')],
- [sg.OK(pad=((figure_w / 2, 0), 3), size=(4, 2))]]
- # create the window and show it without the plot
- window = sg.Window('Demo Application - Embedding Matplotlib In PySimpleGUI').Layout(layout).Finalize()
- # add the plot to the window
- fig_photo = draw_figure(window.FindElement('canvas').TKCanvas, fig)
- # show it all again and get buttons
- event, values = window.Read()
- To get a tkinter Canvas Widget from PySimpleGUI, follow these steps:
- * Add Canvas Element to your window
- * Layout your window
- * Call `window.Finalize()` - this is a critical step you must not forget
- * Find the Canvas Element by looking up using key
- * Your Canvas Widget Object will be the found_element.TKCanvas
- * Draw on your canvas to your heart's content
- * Call `window.Read()` - Nothing will appear on your canvas until you call Read
- See `Demo_Matplotlib.py` for a Recipe you can copy.
- ### Canvas Methods
- TKCanvas - not a method but a property. Returns the tkinter Canvas Widget
- <!-- %!% -->
- ## Graph Element
- All you math fans will enjoy this Element... and all you non-math fans will enjoy it too.
- I've found nothing to be less fun than dealing with a graphic's coordinate system from a GUI Framework. It's always upside down from what I want. (0,0) is in the upper left hand corner. In short, it's a **pain in the ass**.
- Graph Element to the rescue. A Graph Element creates a pixel addressable canvas using YOUR coordinate system. *You* get to define the units on the X and Y axis.
- There are 3 values you'll need to supply the Graph Element. They are:
- * Size of the canvas in pixels
- * The lower left (x,y) coordinate of your coordinate system
- * The upper right (x,y) coordinate of your coordinate system
- After you supply those values you can scribble all of over your graph by creating Graph Figures. Graph Figures are created, and a Figure ID is obtained by calling:
- * DrawCircle
- * DrawLine
- * DrawPoint
- * DrawRectangle
- * DrawOval
- * DrawImage
- You can move your figures around on the canvas by supplying the Figure ID the x,y amount to move.
- graph.MoveFigure(my_circle, 10, 10)
- This Element is relatively new and may have some parameter additions or deletions. It shouldn't break your code however.
- <!-- <+Graph+> -->
- <!--
- ```python
- Graph(canvas_size,
- graph_bottom_left,
- graph_top_right,
- background_color=None,
- pad=None,
- change_submits=False,
- drag_submits=False
- enable_events=False,
- key=None,
- tooltip=None,
- right_click_menu=None,
- visible=True)
- ``` -->
- ### Graph Methods
- ```python
- DrawLine(self, point_from, point_to, color='black', width=1)
- DrawPoint(self, point, size=2, color='black')
- DrawCircle(self, center_location, radius, fill_color=None, line_color='black')
- DrawOval(self, top_left, bottom_right, fill_color=None, line_color=None)
- DrawArc(self, top_left, bottom_right, extent, start_angle, style=None, arc_color='black')
- DrawRectangle(self, top_left, bottom_right, fill_color=None, line_color=None)
- DrawText(self, text, location, color='black', font=None, angle=0)
- Erase(background_color)
- DeleteFigure(figure_id)
- Update()
- Move(self, x_direction, y_direction)
- MoveFigure(self, figure, x_direction, y_direction)
- RelocateFigure(self, figure, x, y)
- TKCanvas
- ```
- All of the Drawing methods return a "***figure***" that can be used move and delete the figure
- DrawLine - draws a line
- DrawPoint - draws a single point
- DrawCircle - draws a circle
- DrawOval - draws an oval
- DrawArc - draws an arc
- DrawRectangle - draws a rectangle
- DrawText - draws text
- DrawImage - places an image onto the graph
- Erase - erases entire graph
- Update - changes background color
- Move - moves everything an x,y direction
- MoveFigure - moves an individual figure by some delta
- RelocateFigure - moves figure to an absolute location
- DeleteFigure - delete an individual figure
- <!-- %!% -->
- ## Table Element
- Out of all of the Elements, it's the Table and the Tree that are the most "problematic" in the tkinter inter and Qt implementations. They're hard is my only defense.
- ### Known visualization problem....
- If you click on the header, it can go into spasms for some tables. I don't understand what's causing it and it's been there evidently since the first release of Tables.
- <!-- <+Table+> -->
- <!-- ```python
- Table( values,
- headings=None,
- visible_column_map=None,
- col_widths=None,
- def_col_width=10,
- auto_size_columns=True,
- max_col_width=20,
- select_mode=None,
- display_row_numbers=False,
- num_rows=None,
- row_height=None,
- font=None,
- justification='right',
- text_color=None,
- background_color=None,
- alternating_row_color=None,
- row_colors=None,
- vertical_scroll_only=True,
- size=(None,None),
- change_submits=False,
- enable_events=False,
- bind_return_key=False,
- pad=None,
- key=None,
- tooltip=None,
- right_click_menu=None,
- visible=True):
- ```
- values - Your table's array
- headings - list of strings representing your headings, if you have any
- visible_column_map - list of bools. If True, column in that position is shown. Defaults to all columns
- col_widths - list of column widths
- def_col_width - default column width. defaults to 10
- auto_size_columns - bool. If True column widths are determined by table contents
- max_col_width - maximum width of a column. defaults to 25
- select_mode - table rows can be selected, but doesn't currently do anything
- display_row_numbers - bool. If True shows numbers next to rows
- num_rows = the number of rows to display at a time (same as size[0])
- row_height = number of pixels high a row should be. Normally left as default value
- font - font for table entries
- justification - left, right, center
- text_color - color of text
- alternating row color - if set will change background color for alternating rows
- row_colors - list of tuples representing (row_number, color) e.g. row_colors = ((5, 'white', 'blue'), (0,'red'), (15,'yellow'))
- vertical_scroll_only - if True will not show a horizontal scrollbar. NOTE - will have to disable to get horizontal scrollbars
- background_color - cell background color
- size - (None, number of rows) - don't use, use num_rows instead
- enable_events - will return a 'row selected' event when row is selected
- change_submits - the old way of indicating enable_events
- bind_return_key - returns event if a double click or a return key is pressed while row is highlighted
- pad - element padding for packing
- key - key used to lookup element
- tooltip - tooltip text -->
- ### Read return values from Table Element
- The values returned from a `Window.Read` call for the Tree Element are a list of row numbers that are currently highlighted.
- ### Update Call
- The Update method can be used to make changes to a table that's already been displayed. The call takes a single parameter, values, which is the new table to display. The entire table is replaced.
- ```python
- def Update(self, values=None):
- ```
- `values` is a table containing your rows just like you passed in when creating the Table Element.
- <!-- %!% -->
- ## Tree Element
- The Tree Element and Table Element are close cousins. Many of the parameters found in the Table Element apply to Tree Elements. In particular the heading information, column widths, etc.
- <!-- <+Tree+> -->
- <!-- ```python
- Tree( data=None,
- headings=None,
- visible_column_map=None,
- col_widths=None,
- col0_width=10,
- def_col_width=10,
- auto_size_columns=True,
- max_col_width=20,
- select_mode=None,
- show_expanded=False,
- change_submits=False,
- enable_events=False,
- font=None,
- justification='right',
- text_color=None,
- background_color=None,
- num_rows=None,
- row_height=None,
- pad=None,
- key=None,
- tooltip=None,
- right_click_menu=None,
- visible=True)
- ```
- ```
- class Tree(data=None - data in TreeData format
- headings=None - list of strings representing your headings
- visible_column_map=None - list of bools indicating which columns to display
- col_widths=None - list of column widths
- col0_width=10 - width of the first column which has the text data
- def_col_width=10 - default column width
- auto_size_columns=True - if true will autosize columns (currenly only sizes to col heading width)
- max_col_width=20 - max width for columns in characters
- select_mode=None - not yet used
- show_expanded - Bool - if True the tree will be fully expanded when shown
- font=None - the display font
- justification='right' - justification for data display
- text_color=None- color of text to display
- background_color=None - background color
- num_rows=None - number of rows to display
- row_height=None - height of rows in pixels
- pad=None - element padding
- key=None - key for element
- tooltip=None - tooltip
- ```
- -->
- Unlike Tables there is no standard format for trees. Thus the data structure passed to the Tree Element must be constructed. This is done using the TreeData class. The process is as follows:
- * Get a TreeData Object
- * "Insert" data into the tree
- * Pass the filled in TreeData object to Tree Element
- #### TreeData format
- ```python
- def TreeData()
- def Insert(self, parent, key, text, values, icon=None)
- ```
- To "insert" data into the tree the TreeData method Insert is called.
- `Insert(parent_key, key, display_text, values)`
- To indicate insertion at the head of the tree, use a parent key of "". So, every top-level node in the tree will have a parent node = ""
- This code creates a TreeData object and populates with 3 values
- ```python
- treedata = sg.TreeData()
- treedata.Insert("", '_A_', 'A', [1,2,3])
- treedata.Insert("", '_B_', 'B', [4,5,6])
- treedata.Insert("_A_", '_A1_', 'A1', ['can','be','anything'])
- ```
- Note that you ***can*** use the same values for display_text and keys. The only thing you have to watch for is that you cannot repeat keys.
- When Reading a window the Table Element will return a list of rows that are selected by the user. The list will be empty is no rows are selected.
- #### Icons on Tree Entries
- If you wish to show an icon next to a tree item, then you specify the icon in the call to `Insert`. You pass in a filename or a Base64 bytes string using the optional `icon` parameter.
- Here is the result of showing an icon with a tree entry.
- 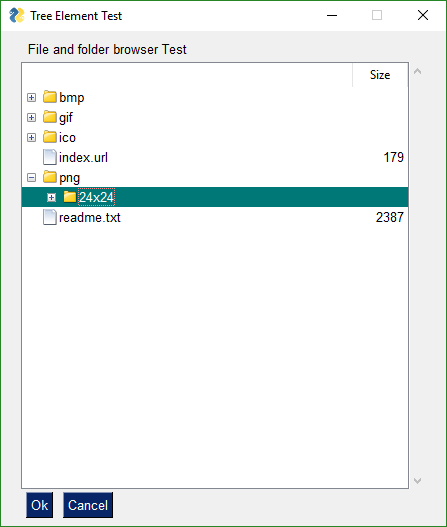
- ## Tab and Tab Group Elements
- Tabs have been a part of PySimpleGUI since the initial release. However, the initial implementation applied tabs at the top level only. The entire window had to be tabbed. There with other limitations that came along with that implementation. That all changed in version 3.8.0 with the new elements - Tab and TabGroup. The old implementation of Tabs was removed in version 3.8.0 as well.
- Tabs are another "Container Element". The other Container Elements include:
- * Frame
- * Column
- You layout a Frame in exactly the same way as a Frame or Column elements, by passing in a list of elements.
- How you place a Tab into a Window is different than Graph or Frame elements. You cannot place a tab directly into a Window's layout. It much first be placed into a TabGroup. The TabGroup can then be placed into the Window.
- Let's look at this Window as an example:
- 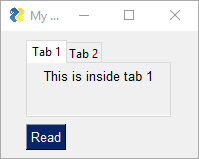
- View of second tab:
- 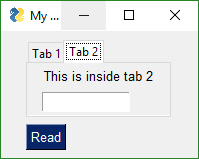
- First we have the Tab layout definitions. They mirror what you see in the screen shots. Tab 1 has 1 Text Element in it. Tab 2 has a Text and an Input Element.
- tab1_layout = [[sg.T('This is inside tab 1')]]
- tab2_layout = [[sg.T('This is inside tab 2')],
- [sg.In(key='in')]]
- The layout for the entire window looks like this:
- layout = [[sg.TabGroup([[sg.Tab('Tab 1', tab1_layout), sg.Tab('Tab 2', tab2_layout)]])],
- [sg.RButton('Read')]]
- The Window layout has the TabGroup and within the tab Group are the two Tab elements.
- One important thing to notice about all of these container Elements... they all take a "list of lists" at the layout. They all have a layout that starts with `[[`
- You will want to keep this `[[ ]]` construct in your head a you're debugging your tabbed windows. It's easy to overlook one or two necessary ['s
- As mentioned earlier, the old-style Tabs were limited to being at the Window-level only. In other words, the tabs were equal in size to the entire window. This is not the case with the "new-style" tabs. This is why you're not going to be upset when you discover your old code no longer works with the new PySimpleGUI release. It'll be worth the few moments it'll take to convert your code.
- Check out what's possible with the NEW Tabs!
- 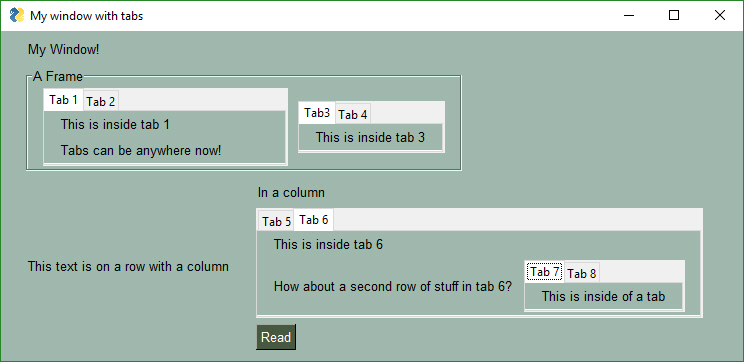
- Check out Tabs 7 and 8. We've got a Window with a Column containing Tabs 5 and 6. On Tab 6 are... Tabs 7 and 8.
- As of Release 3.8.0, not all of *options* shown in the API definitions of the Tab and TabGroup Elements are working. They are there as placeholders.
- The definition of a TabGroup is
- TabGroup(layout,
- title_color=None
- background_color=None
- font=None
- pad=None
- border_width=None
- change_submits = False
- key=None
- tooltip=None)
- The definition of a Tab Element is
- Tab(title,
- layout,
- title_color=None,
- background_color=None,
- font=None,
- pad=None
- disabled=False
- border_width=None
- key=None
- tooltip=None)
- ### Reading Tab Groups
- Tab Groups now return a value when a Read returns. They return which tab is currently selected. There is also a change_submits parameter that can be set that causes a Read to return if a Tab in that group is selected / changed. The key or title belonging to the Tab that was switched to will be returned as the value
- ### Tab Element Methods
- ```python
- Update(disabled = None, visible=None)
- ```
- WARNING - This Update method may not be working correctly
- <!-- %!% -->
- ## Pane Element
- New in version 3.20 is the Pane Element, a super-cool tkinter feature. You won't find this one in PySimpleGUIQt, only PySimpleGUI. It's difficult to describe one of these things. Think of them as "Tabs without labels" that you can slide.
- 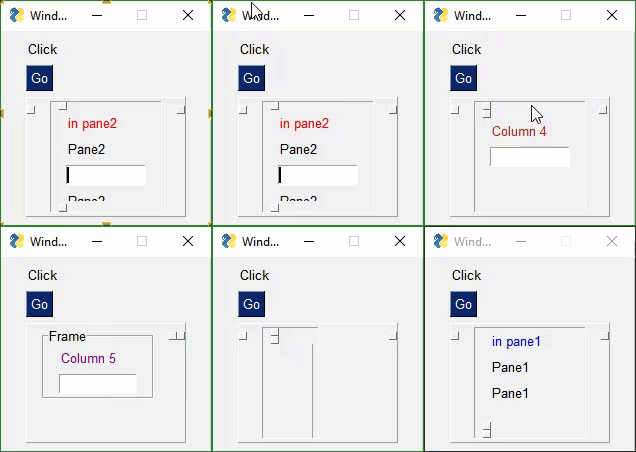
- <!-- <+Pane+> -->
- <!--
- ```python
- Pane(pane_list, background_color=None, size=(None, None), pad=None, orientation='vertical', show_handle=True, relief=RELIEF_RAISED, handle_size=None, border_width=None, key=None, visible=True):
- ``` -->
- ***Each "Pane" of a Pane Element must be a Column Element***. The parameter `pane_list` is a list of Column Elements.
- Calls can get a little hairy looking if you try to declare everything in-line as you can see in this example.
- ```python
- sg.Pane([col5, sg.Column([[sg.Pane([col1, col2, col4], handle_size=15, orientation='v', background_color=None, show_handle=True, visible=True, key='_PANE_', border_width=0, relief=sg.RELIEF_GROOVE),]]),col3 ], orientation='h', background_color=None, size=(160,160), relief=sg.RELIEF_RAISED, border_width=0)
- ```
- Combing these with *visibility* make for an interesting interface with entire panes being hidden from view until neded by the user. It's one way of producing "dynamic" windows.
- ## Colors
- Starting in version 2.5 you can change the background colors for the window and the Elements.
- Your windows can go from this:
- 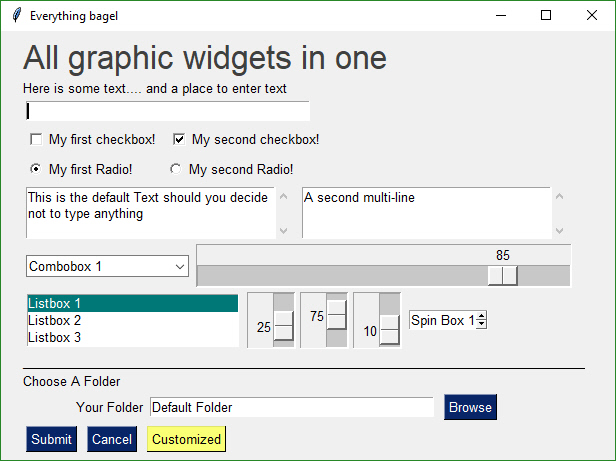
- to this... with one function call...
- 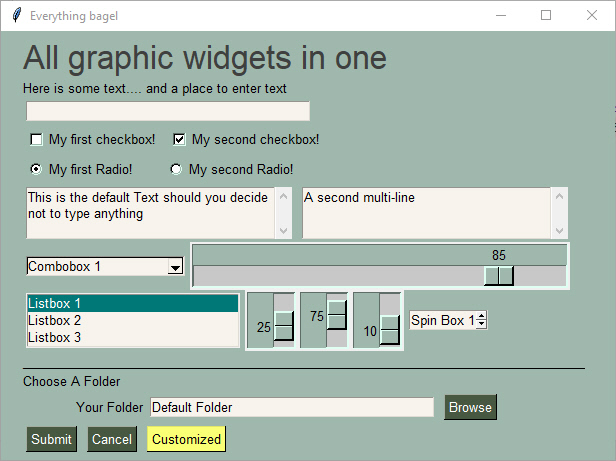
- While you can do it on an element by element or window level basis, the easiest way, by far, is a call to `SetOptions`.
- Be aware that once you change these options they are changed for the rest of your program's execution. All of your windows will have that look and feel, until you change it to something else (which could be the system default colors.
- This call sets all of the different color options.
- SetOptions(background_color='#9FB8AD',
- text_element_background_color='#9FB8AD',
- element_background_color='#9FB8AD',
- scrollbar_color=None,
- input_elements_background_color='#F7F3EC',
- progress_meter_color = ('green', 'blue')
- button_color=('white','#475841'))
- # SystemTray
- This is a PySimpleGUIQt and PySimpleGUIWx only feature. Don't know of a way to do it using tkinter. Your source code for SystemTray is identical for the Qt and Wx implementations. You can switch frameworks by simply changing your import statement.
- In addition to running normal windows, it's now also possible to have an icon down in the system tray that you can read to get menu events. There is a new SystemTray object that is used much like a Window object. You first get one, then you perform Reads in order to get events.
- Here is the definition of the SystemTray object.
- ```python
- SystemTray(menu=None, filename=None, data=None, data_base64=None, tooltip=None):
- '''
- SystemTray - create an icon in the system tray
- :param menu: Menu definition
- :param filename: filename for icon
- :param data: in-ram image for icon
- :param data_base64: basee-64 data for icon
- :param tooltip: tooltip string '''
- ```
- You'll notice that there are 3 different ways to specify the icon image. The base-64 parameter allows you to define a variable in your .py code that is the encoded image so that you do not need any additional files. Very handy feature.
- ## System Tray Design Pattern
- Here is a design pattern you can use to get a jump-start.
- This program will create a system tray icon and perform a blocking Read. If the item "Open" is chosen from the system tray, then a popup is shown.
- ```python
- import PySimpleGUIQt as sg
- menu_def = ['BLANK', ['&Open', '---', '&Save', ['1', '2', ['a', 'b']], '&Properties', 'E&xit']]
- tray = sg.SystemTray(menu=menu_def, filename=r'default_icon.ico')
- while True: # The event loop
- menu_item = tray.Read()
- print(menu_item)
- if menu_item == 'Exit':
- break
- elif menu_item == 'Open':
- sg.Popup('Menu item chosen', menu_item)
- ```
- The design pattern creates an icon that will display this menu:
- 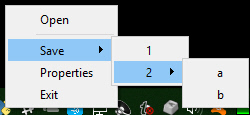
- ### Icons
- When specifying "icons", you can use 3 different formats.
- * `filename`- filename
- * `data_base64` - base64 byte string
- * '`data` - in-ram bitmap or other "raw" image
- You will find 3 parameters used to specify these 3 options on both the initialize statement and on the Update method.
- ## Menu Definition
- ```python
- menu_def = ['BLANK', ['&Open', '&Save', ['1', '2', ['a', 'b']], '!&Properties', 'E&xit']]
- ```
- A menu is defined using a list. A "Menu entry" is a string that specifies:
- * text shown
- * keyboard shortcut
- * key
- See section on Menu Keys for more information on using keys with menus.
- An entry without a key and keyboard shortcut is a simple string
- `'Menu Item'`
- If you want to make the "M" be a keyboard shortcut, place an `&` in front of the letter that is the shortcut.
- `'&Menu Item'`
- You can add "keys" to make menu items unique or as another way of identifying a menu item than the text shown. The key is added to the text portion by placing `::` after the text.
- `'Menu Item::key'`
- The first entry can be ignored.`'BLANK`' was chosen for this example. It's this way because normally you would specify these menus under some heading on a menu-bar. But here there is no heading so it's filled in with any value you want.
- **Separators**
- If you want a separator between 2 items, add the entry `'---'` and it will add a separator item at that place in your menu.
- **Disabled menu entries**
- If you want to disable a menu entry, place a `!` before the menu entry
- ## SystemTray Methods
- ### Read - Read the context menu or check for events
- ```python
- def Read(timeout=None)
- '''
- Reads the context menu
- :param timeout: Optional. Any value other than None indicates a non-blocking read
- :return: String representing meny item chosen. None if nothing read.
- '''
- ```
- The `timeout` parameter specifies how long to wait for an event to take place. If nothing happens within the timeout period, then a "timeout event" is returned. These types of reads make it possible to run asynchronously. To run non-blocked, specify `timeout=0`on the Read call.
- Read returns the menu text, complete with key, for the menu item chosen. If you specified `Open::key` as the menu entry, and the user clicked on `Open`, then you will receive the string `Open::key` upon completion of the Read.
- #### Read special return values
- In addition to Menu Items, the Read call can return several special values. They include:
- EVENT_SYSTEM_TRAY_ICON_DOUBLE_CLICKED - Tray icon was double clicked
- EVENT_SYSTEM_TRAY_ICON_ACTIVATED - Tray icon was single clicked
- EVENT_SYSTEM_TRAY_MESSAGE_CLICKED - a message balloon was clicked
- TIMEOUT_KEY is returned if no events are available if the timeout value is set in the Read call
- ### Hide
- Hides the icon. Note that no message balloons are shown while an icon is hidden.
- ```python
- def Hide()
- ```
- ### Close
- Does the same thing as hide
- ```python
- def Close()
- ```
- ### UnHide
- Shows a previously hidden icon
- ```python
- def UnHide()
- ```
- ### ShowMessage
- Shows a balloon above the icon in the system tray area. You can specify your own icon to be shown in the balloon, or you can set `messageicon` to one of the preset values.
- This message has a custom icon.
- 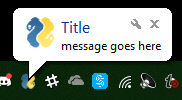
- The preset `messageicon` values are:
- SYSTEM_TRAY_MESSAGE_ICON_INFORMATION
- SYSTEM_TRAY_MESSAGE_ICON_WARNING
- SYSTEM_TRAY_MESSAGE_ICON_CRITICAL
- SYSTEM_TRAY_MESSAGE_ICON_NOICON
- ```python
- ShowMessage(title, message, filename=None, data=None, data_base64=None, messageicon=None, time=10000):
- '''
- Shows a balloon above icon in system tray
- :param title: Title shown in balloon
- :param message: Message to be displayed
- :param filename: Optional icon filename
- :param data: Optional in-ram icon
- :param data_base64: Optional base64 icon
- :param time: How long to display message in milliseconds :return:
- '''
- ```
- Note, on windows it may be necessary to make a registry change to enable message balloons to be seen. To fix this, you must create the DWORD you see in this screenshot.
- 
- ### Update
- You can update any of these items within a SystemTray object
- * Menu definition
- * Icon
- * Tooltip
- Change them all or just 1.
- ```python
- Update(menu=None, tooltip=None,filename=None, data=None, data_base64=None,)
- '''
- Updates the menu, tooltip or icon
- :param menu: menu defintion
- :param tooltip: string representing tooltip
- :param filename: icon filename
- :param data: icon raw image
- :param data_base64: icon base 64 image
- :return:
- '''
- ```
- # Global Settings
- **Global Settings**
- Let's have some fun customizing! Make PySimpleGUI look the way you want it to look. You can set the global settings using the function `PySimpleGUI.SetOptions`. Each option has an optional parameter that's used to set it.
- SetOptions(icon=None
- button_color=(None,None)
- element_size=(None,None),
- margins=(None,None),
- element_padding=(None,None)
- auto_size_text=None
- auto_size_buttons=None
- font=None
- border_width=None
- slider_border_width=None
- slider_relief=None
- slider_orientation=None
- autoclose_time=None
- message_box_line_width=None
- progress_meter_border_depth=None
- progress_meter_style=None
- progress_meter_relief=None
- progress_meter_color=None
- progress_meter_size=None
- text_justification=None
- text_color=None
- background_color=None
- element_background_color=None
- text_element_background_color=None
- input_elements_background_color=None
- element_text_color=None
- input_text_color=None
- scrollbar_color=None, text_color=None
- debug_win_size=(None,None)
- window_location=(None,None)
- tooltip_time = None
- Explanation of parameters
- icon - filename of icon used for taskbar and title bar
- button_color - button color (foreground, background)
- element_size - element size (width, height) in characters
- margins - tkinter margins around outsize
- element_padding - tkinter padding around each element
- auto_size_text - autosize the elements to fit their text
- auto_size_buttons - autosize the buttons to fit their text
- font - font used for elements
- border_width - amount of bezel or border around sunken or raised elements
- slider_border_width - changes the way sliders look
- slider_relief - changes the way sliders look
- slider_orientation - changes orientation of slider
- autoclose_time - time in seconds for autoclose boxes
- message_box_line_width - number of characers in a line of text in message boxes
- progress_meter_border_depth - amount of border around raised or lowered progress meters
- progress_meter_style - style of progress meter as defined by tkinter
- progress_meter_relief - relief style
- progress_meter_color - color of the bar and background of progress meters
- progress_meter_size - size in (characters, pixels)
- background_color - Color of the main window's background
- element_background_color - Background color of the elements
- text_element_background_color - Text element background color
- input_elements_background_color - Input fields background color
- element_text_color - Text color of elements that have text, like Radio Buttons
- input_text_color - Color of the text that you type in
- scrollbar_color - Color for scrollbars (may not always work)
- text_color - Text element default text color
- text_justification - justification to use on Text Elements. Values are strings - 'left', 'right', 'center'
- debug_win_size - size of the Print output window
- window_location - location on the screen (x,y) of window's top left cornder
- tooltip_time - time in milliseconds to wait before showing a tooltip. Default is 400ms
- These settings apply to all windows `SetOptions`. The Row options and Element options will take precedence over these settings. Settings can be thought of as levels of settings with the window-level being the highest and the Element-level the lowest. Thus the levels are:
- - window level
- - Row level
- - Element level
- Each lower level overrides the settings of the higher level. Once settings have been changed, they remain changed for the duration of the program (unless changed again).
- # Persistent windows (Window stays open after button click)
- Apologies that the next few pages are perhaps confusing. There have been a number of changes recently in PySimpleGUI's Read calls that added some really cool stuff, but at the expense of being not so simple. Part of the issue is an attempt to make sure existing code doesn't break. These changes are all in the area of non-blocking reads and reads with timeouts.
- There are 2 ways to keep a window open after the user has clicked a button. One way is to use non-blocking windows (see the next section). The other way is to use buttons that 'read' the window instead of 'close' the window when clicked. The typical buttons you find in windows, including the shortcut buttons, close the window. These include OK, Cancel, Submit, etc. The Button Element also closes the window.
- The `RButton` Element creates a button that when clicked will return control to the user, but will leave the window open and visible. This button is also used in Non-Blocking windows. The difference is in which call is made to read the window. The normal `Read` call with no parameters will block, a call with a `timeout` value of zero will not block.
- Note that `InputText` and `MultiLine` Elements will be **cleared** when performing a `Read`. If you do not want your input field to be cleared after a `Read` then you can set the `do_not_clear` parameter to True when creating those elements. The clear is turned on and off on an element by element basis.
- The reasoning behind this is that Persistent Windows are often "forms". When "submitting" a form you want to have all of the fields left blank so the next entry of data will start with a fresh window. Also, when implementing a "Chat Window" type of interface, after each read / send of the chat data, you want the input field cleared. Think of it as a Texting application. Would you want to have to clear your previous text if you want to send a second text?
- The design pattern for Persistent Windows was already shown to you earlier in the document... here it is for your convenience.
- ```python
- import PySimpleGUI as sg
- layout = [[sg.Text('Persistent window')],
- [sg.Input()],
- [sg.RButton('Read'), sg.Exit()]]
- window = sg.Window('Window that stays open').Layout(layout)
- while True:
- event, values = window.Read()
- if event is None or event == 'Exit':
- break
- print(event, values)
- window.Close()
- ```
- ## Read(timeout = t, timeout_key='timeout')
- Read with a timeout is a very good thing for your GUIs to use in a read non-blocking situation, if you can use them. If your device can wait for a little while, then use this kind of read. The longer you're able to add to the timeout value, the less CPU time you'll be taking.
- One way of thinking of reads with timeouts:
- > During the timeout time, you are "yielding" the processor to do other tasks.
- But it gets better than just being a good citizen....**your GUI will be more responsive than if you used a non-blocking read**
- Let's say you had a device that you want to "poll" every 100ms. The "easy way out" and the only way out until recently was this:
- ```python
- # YOU SHOULD NOT DO THIS....
- while True: # Event Loop
- event, values = window.ReadNonBlocking() # DO NOT USE THIS CALL ANYMORE
- read_my_hardware() # process my device here
- time.sleep(.1) # sleep 1/10 second
- ```
- This program will quickly test for user input, then deal with the hardware. Then it'll sleep for 100ms, while your gui is non-responsive, then it'll check in with your GUI again. I fully realize this is a crude way of doing things. We're talking dirt simple stuff without trying to use threads, etc to 'get it right'. It's for demonstration purposes.
- The new and better way....
- using the Read Timeout mechanism, the sleep goes away.
- ```python
- # This is the right way to poll for hardware
- while True: # Event Loop
- event, values = window.Read(timeout = 100)
- read_my_hardware() # process my device here
- ```
- This event loop will run every 100 ms. You're making a Read call, so anything that the use does will return back to you immediately, and you're waiting up to 100ms for the user to do something. If the user doesn't do anything, then the read will timeout and execution will return to the program.
- ## Non-Blocking Windows (Asynchronous reads)
- There are TWO ways to perform a non-blocking read.
- The "old way" was:
- ```python
- event, values = sg.ReadNonBlocking()
- ```
- The new way
- ```python
- event, values = sg.Read(timeout=0)
- ```
- You should use the new way if you're reading this for the first time.
- The difference in the 2 calls is in the value of event. For ReadNonBlocking, event will be `None` if there are no other events to report. There is a "problem" with this however. With normal Read calls, an event value of None signified the window was closed. For ReadNonBlocking, the way a closed window is returned is via the values variable being set to None.
- ## sg.TIMEOUT_KEY
- If you're using the new, timeout=0 method, then an event value of None signifies that the window was closed, just like a normal Read. That leaves the question of what it is set to when not other events are happening. This value will be the value of `timeout_key`. If you did not specify a timeout_key value in your call to read, then it will be set to a default value of:
- TIMEOUT_KEY = '__timeout__'
- If you wanted to test for "no event" in your loop, it would be written like this:
- ```python
- while True:
- event, value = window.Read(timeout=0)
- if event is None:
- break # the use has closed the window
- if event == sg.TIMEOUT_KEY:
- print("Nothing happened")
- ```
- Use async windows sparingly. It's possible to have a window that appears to be async, but it is not. **Please** try to find other methods before going to async windows. The reason for this plea is that async windows poll tkinter over and over. If you do not have a sleep in your loop, you will eat up 100% of the CPU time. It's important to be a good citizen. Don't chew up CPU cycles needlessly.
- Non-blocking is generally reserved as a "last resort". Too many times people use non-blocking reads when a blocking read will do just fine.
- There is a hybrid approach... a read with a timeout. You'll score much higher points on the impressive meter if you're able to use a lot less CPU time by using this type of read.
- The most legit time to use a non-blocking window is when you're working directly with hardware. Maybe you're driving a serial bus. If you look at the Event Loop in the Demo_OpenCV_Webcam.py program, you'll see that the read is a non-blocking read. However, there is a place in the event loop where blocking occurs. The point in the loop where you will block is the call to read frames from the webcam. When a frame is available you want to quickly deliver it to the output device, so you don't want your GUI blocking. You want the read from the hardware to block.
- Another example can be found in the demo for controlling a robot on a Raspberry Pi. In that application you want to read the direction buttons, forward, backward, etc, and immediately take action. If you are using RealtimeButtons, your only option at the moment is to use non-blocking windows. You have to set the timeout to zero if you want the buttons to be real-time responsive.
- However, with these buttons, adding a sleep to your event loop will at least give other processes time to execute. It will, however, starve your GUI. The entire time you're sleeping, your GUI isn't executing.
- ### Periodically Calling`Read`
- Let's say you do end up using non-blocking reads... then you've got some housekeeping to do. It's up to you to periodically "refresh" the visible GUI. The longer you wait between updates to your GUI the more sluggish your windows will feel. It is up to you to make these calls or your GUI will freeze.
- There are 2 methods of interacting with non-blocking windows.
- 1. Read the window just as you would a normal window
- 2. "Refresh" the window's values without reading the window. It's a quick operation meant to show the user the latest values
- With asynchronous windows the window is shown, user input is read, but your code keeps right on chugging. YOUR responsibility is to call `PySimpleGUI.Read` on a periodic basis. Several times a second or more will produce a reasonably snappy GUI.
- ## Exiting (Closing) a Persistent Window
- If your window has a button that closes the window, then PySimpleGUI will automatically close the window for you. If all of your buttons are ReadButtons, then it'll be up to you to close the window when done.
- To close a window, call the `Close` method.
- ```python
- window.Close()
- ```
- ## Persistent Window Example - Running timer that updates
- See the sample code on the GitHub named Demo Media Player for another example of Async windows. We're going to make a window and update one of the elements of that window every .01 seconds. Here's the entire code to do that.
- ```python
- import PySimpleGUI as sg
- import time
- # ---------------- Create Form ----------------
- sg.ChangeLookAndFeel('Black')
- sg.SetOptions(element_padding=(0, 0))
- layout = [[sg.Text('')],
- [sg.Text('', size=(8, 2), font=('Helvetica', 20), justification='center', key='text')],
- [sg.ReadButton('Pause', key='button', button_color=('white', '#001480')),
- sg.ReadButton('Reset', button_color=('white', '#007339'), key='Reset'),
- sg.Exit(button_color=('white', 'firebrick4'), key='Exit')]]
- window = sg.Window('Running Timer', no_titlebar=True, auto_size_buttons=False, keep_on_top=True, grab_anywhere=True).Layout(layout)
- # ---------------- main loop ----------------
- current_time = 0
- paused = False
- start_time = int(round(time.time() * 100))
- while (True):
- # --------- Read and update window --------
- event, values = window.Read(timeout=10)
- current_time = int(round(time.time() * 100)) - start_time
- # --------- Display timer in window --------
- window.FindElement('text').Update('{:02d}:{:02d}.{:02d}'.format((current_time // 100) // 60,
- (current_time // 100) % 60,
- current_time % 100))
- ```
- Previously this program was implemented using a sleep in the loop to control the clock tick. This version uses the new timeout parameter. The result is a window that reacts quicker then the one with the sleep and the accuracy is just as good.
- ## Instead of a Non-blocking Read --- Use `change_submits = True` or return_keyboard_events = True
- Any time you are thinking "I want an X Element to cause a Y Element to do something", then you want to use the `change_submits` option.
- ***Instead of polling, try options that cause the window to return to you.*** By using non-blocking windows, you are *polling*. You can indeed create your application by polling. It will work. But you're going to be maxing out your processor and may even take longer to react to an event than if you used another technique.
- **Examples**
- One example is you have an input field that changes as you press buttons on an on-screen keypad.
- 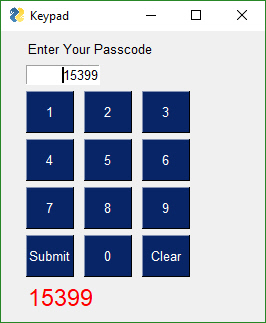
- # Updating Elements (changing elements in active window)
- If you want to change Elements in your window after the window has been created, then you will call the Element's Update method.
- **NOTE** a window **must be Read or Finalized** before any Update calls can be made.
- Here is an example of updating a Text Element
- ```python
- import PySimpleGUI as sg
- layout = [ [sg.Text('My layout', key='_TEXT_')],
- [sg.Button('Read')]]
- window = sg.Window('My new window').Layout(layout)
- while True: # Event Loop
- event, values = window.Read()
- if event is None:
- break
- window.Element('_TEXT_').Update('My new text value')
- ```
- Notice the placement of the Update call. If you wanted to Update the Text Element *prior* to the Read call, outside of the event loop, then you must call Finalize on the window first.
- In this example, the Update is done prior the Read. Because of this, the Finalize call is added to the Window creation.
- ```python
- import PySimpleGUI as sg
- layout = [ [sg.Text('My layout', key='_TEXT_')],
- [sg.Button('Read')]
- ]
- window = sg.Window('My new window').Layout(layout).Finalize()
- window.Element('_TEXT_').Update('My new text value')
- while True: # Event Loop
- event, values = window.Read()
- if event is None:
- break
- ```
- Persistent windows remain open and thus continue to interact with the user after the Read has returned. Often the program wishes to communicate results (output information) or change an Element's values (such as populating a List Element).
- You can use Update to do things like:
- * Have one Element (appear to) make a change to another Element
- * Disable a button, slider, input field, etc
- * Change a button's text
- * Change an Element's text or background color
- * Add text to a scrolling output window
- * Change the choices in a list
- * etc
- The way this is done is via an Update method that is available for nearly all of the Elements. Here is an example of a program that uses a persistent window that is updated.
- 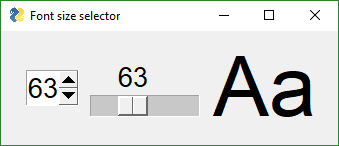
- In some programs these updates happen in response to another Element. This program takes a Spinner and a Slider's input values and uses them to resize a Text Element. The Spinner and Slider are on the left, the Text element being changed is on the right.
- # Testing async window, see if can have a slider
- # that adjusts the size of text displayed
- import PySimpleGUI as sg
- fontSize = 12
- layout = [[sg.Spin([sz for sz in range(6, 172)], font=('Helvetica 20'), initial_value=fontSize, change_submits=True, key='spin'),
- sg.Slider(range=(6,172), orientation='h', size=(10,20),
- change_submits=True, key='slider', font=('Helvetica 20')),
- sg.Text("Aa", size=(2, 1), font="Helvetica " + str(fontSize), key='text')]]
- sz = fontSize
- window = sg.Window("Font size selector", grab_anywhere=False).Layout(layout)
- # Event Loop
- while True:
- event, values= window.Read()
- if event is None:
- break
- sz_spin = int(values['spin'])
- sz_slider = int(values['slider'])
- sz = sz_spin if sz_spin != fontSize else sz_slider
- if sz != fontSize:
- fontSize = sz
- font = "Helvetica " + str(fontSize)
- window.FindElement('text').Update(font=font)
- window.FindElement('slider').Update(sz)
- window.FindElement('spin').Update(sz)
- print("Done.")
- Inside the event loop we read the value of the Spinner and the Slider using those Elements' keys.
- For example, `values['slider']` is the value of the Slider Element.
- This program changes all 3 elements if either the Slider or the Spinner changes. This is done with these statements:
- window.FindElement('text').Update(font=font)
- window.FindElement('slider').Update(sz)
- window.FindElement('spin').Update(sz)
- Remember this design pattern because you will use it OFTEN if you use persistent windows.
- It works as follows. The call to `window.FindElement` returns the Element object represented by they provided `key`. This element is then updated by calling it's `Update` method. This is another example of Python's "chaining" feature. We could write this code using the long-form:
- text_element = window.FindElement('text')
- text_element.Update(font=font)
- The takeaway from this exercise is that keys are key in PySimpleGUI's design. They are used to both read the values of the window and also to identify elements. As already mentioned, they are used as targets in Button calls.
- ### Locating Elements
- The Window method call that's used to find an element is:
- `FindElement`
- or the shortened version
- `Element`
- When you see a call to window.FindElement or window.Element, then you know an element is being addressed. Normally this is done so you can call the element's Update method.
- ### ProgressBar / Progress Meters
- Note that to change a progress meter's progress, you call UpdateBar, not Update. It's an old naming convention that's left over from before the Update calls were implemented.
- # Keyboard & Mouse Capture
- Beginning in version 2.10 you can capture keyboard key presses and mouse scroll-wheel events. Keyboard keys can be used, for example, to detect the page-up and page-down keys for a PDF viewer. To use this feature, there's a boolean setting in the Window call `return_keyboard_events` that is set to True in order to get keys returned along with buttons.
- Keys and scroll-wheel events are returned in exactly the same way as buttons.
- For scroll-wheel events, if the mouse is scrolled up, then the `button` text will be `MouseWheel:Up`. For downward scrolling, the text returned is `MouseWheel:Down`
- Keyboard keys return 2 types of key events. For "normal" keys (a,b,c, etc), a single character is returned that represents that key. Modifier and special keys are returned as a string with 2 parts:
- Key Sym:Key Code
- Key Sym is a string such as 'Control_L'. The Key Code is a numeric representation of that key. The left control key, when pressed will return the value 'Control_L:17'
- import PySimpleGUI as sg
- # Recipe for getting keys, one at a time as they are released
- # If want to use the space bar, then be sure and disable the "default focus"
- with sg.Window("Keyboard Test", return_keyboard_events=True, use_default_focus=False) as window:
- text_elem = sg.Text("", size=(18, 1))
- layout = [[sg.Text("Press a key or scroll mouse")],
- [text_elem],
- [sg.Button("OK")]]
- window.Layout(layout)
- # ---===--- Loop taking in user input --- #
- while True:
- event, value = window.Read()
- if event == "OK" or event is None:
- print(event, "exiting")
- break
- text_elem.Update(event)
- You want to turn off the default focus so that there no buttons that will be selected should you press the spacebar.
- ### Realtime Keyboard Capture
- Use realtime keyboard capture by calling
- import PySimpleGUI as sg
- with sg.Window("Realtime Keyboard Test", return_keyboard_events=True, use_default_focus=False) as window:
- layout = [[sg.Text("Hold down a key")],
- [sg.Button("OK")]]
- window.Layout(layout)
- while True:
- event, value = window.Read(timeout=0)
- if event == "OK" or event is None:
- print(event, value, "exiting")
- break
- if event != sg.TIMEOUT_KEY:
- print(event)
- # Menus
- ## MenuBar
- Beginning in version 3.01 you can add a MenuBar to your window. You specify the menus in much the same way as you do window layouts, with lists. Menu selections are returned as events and as of 3.17, also as in the values dictionary. The value returned will be the entire menu entry, including the key if you specified one.
- This definition:
- menu_def = [['File', ['Open', 'Save', 'Exit',]],
- ['Edit', ['Paste', ['Special', 'Normal',], 'Undo'],],
- ['Help', 'About...'],]
- Note the placement of ',' and of []. It's tricky to get the nested menus correct that implement cascading menus. See how paste has Special and Normal as a list after it. This means that Paste has a cascading menu with items Special and Normal.
- They menu_def layout produced this window:
- 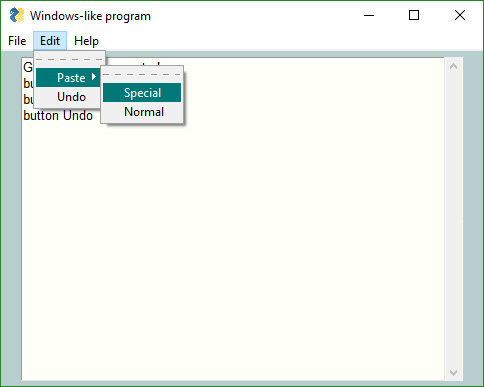
- To add a menu to a Window place the `Menu` or `MenuBar` element into your layout.
- layout = [[sg.Menu(menu_def)]]
- It doesn't really matter where you place the Menu Element in your layout as it will always be located at the top of the window.
- ## ButtonMenus
- Button menus were introduced in version 3.21, having been previously released in PySimpleGUIQt. They work exactly the same and are source code compatible between PySimpleGUI and PySimpleGUIQt. These types of menus take a single menu entry where a Menu Bar takes a list of menu entries.
- ## Right Click Menus
- Right Click Menus were introduced in version 3.21. Almost every element has a right_click_menu parameter and there is a window-level setting for rich click menu that will attach a right click menu to all elements in the window.
- The menu definition is the same a s the button menu definition, a single menu entry.
- ```python
- right_click_menu = ['&Right', ['Right', '!&Click', '&Menu', 'E&xit', 'Properties']]
- ```
- The first string in a right click menu and a button menu is ***ignored***. It is not used. Normally you would put the string that is shown on the menu bar in that location.
- **Return values for right click menus are different than menu bars and button menus.** Instead of the value being returned through the values dictionary, it is instead sent back as an Event. You will not
- ## Menu Shortcut keys
- You have used ALT-key in other Windows programs to navigate menus. For example Alt-F+X exits the program. The Alt-F pulls down the File menu. The X selects the entry marked Exit.
- The good news is that PySimpleGUI allows you to create the same kind of menus! Your program can play with the big-boys. And, it's trivial to do.
- All that's required is for your to add an "&" in front of the letter you want to appear with an underscore. When you hold the Alt key down you will see the menu with underlines that you marked.
- One other little bit of polish you can add are separators in your list. To add a line in your list of menu choices, create a menu entry that looks like this: ` '---'`
- This is an example Menu with underlines and a separator.
- ```
- # ------ Menu Definition ------ #
- menu_def = [['&File', ['&Open', '&Save', '---', 'Properties', 'E&xit' ]],
- ['&Edit', ['Paste', ['Special', 'Normal',], 'Undo'],],
- ['&Help', '&About...'],]
- ```
- And this is the spiffy menu it produced:
- 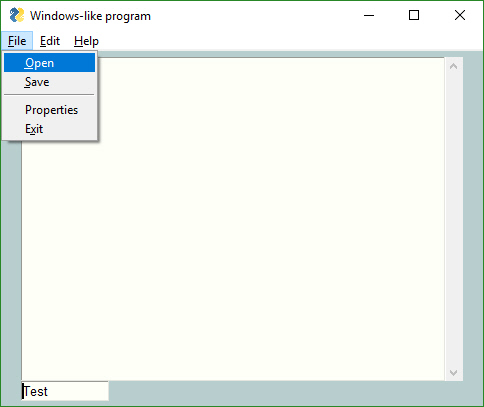
- ## Disabled Menu Entries
- If you want one of your menu items to be disabled, then place a '!' in front of the menu entry. To disable the Paste menu entry in the previous examples, the entry would be:
- `['!&Edit', ['Paste', ['Special', 'Normal',], 'Undo'],]`
- If your want to change the disabled menu item flag / character from '!' to something else, change the variable `MENU_DISABLED_CHARACTER`
- ## Keys for Menus
- Beginning in version 3.17 you can add a `key` to your menu entries. The `key` value will be removed prior to be inserted into the menu. When you receive Menu events, the entire menu entry, including the `key` is returned. A key is indicated by adding `::` after a menu entry, followed by the key.
- To add the `key` `_MY_KEY_` to the Special menu entry, the code would be:
- `['&Edit', ['Paste', ['Special::_MY_KEY_', 'Normal',], 'Undo'],]`
- If you want to change the characters that indicate a key follows from '::' to something else, change the variable `MENU_KEY_SEPARATOR`
- # Running Multiple Windows
- If you wish to run multiple windows in your event loop, then there are 2 methods for doing this.
- 1. First window does not remain active while second window is visible
- 2. First window remains active while second window is visible
- You will find the 2 design matters in 2 demo programs in the Demo Program area of the GitHub (http://www.PySimpleGUI.com)
- ***Critically important***
- When creating a new window you must use a "fresh" layout every time. You cannot reuse a layout from a previous window. As a result you will see the layout for window 2 being defined inside of the larger event loop.
- A rule of thumb to follow:
- > If you are calling `Window` then you should define your window layout
- > in the statement just prior to the `Window` call.
- ## Multi-Window Design Pattern 1 - both windows active
- ```python
- import PySimpleGUI as sg
- # Design pattern 2 - First window remains active
- layout = [[ sg.Text('Window 1'),],
- [sg.Input(do_not_clear=True)],
- [sg.Text('', key='_OUTPUT_')],
- [sg.Button('Launch 2'), sg.Button('Exit')]]
- win1 = sg.Window('Window 1').Layout(layout)
- win2_active = False
- while True:
- ev1, vals1 = win1.Read(timeout=100)
- win1.FindElement('_OUTPUT_').Update(vals1[0])
- if ev1 is None or ev1 == 'Exit':
- break
- if not win2_active and ev1 == 'Launch 2':
- win2_active = True
- layout2 = [[sg.Text('Window 2')],
- [sg.Button('Exit')]]
- win2 = sg.Window('Window 2').Layout(layout2)
- if win2_active:
- ev2, vals2 = win2.Read(timeout=100)
- if ev2 is None or ev2 == 'Exit':
- win2_active = False
- win2.Close()
- ```
- ## Multi-Window Design Pattern 2 - only 1 active window
- ```python
- import PySimpleGUIQt as sg
- # Design pattern 1 - First window does not remain active
- layout = [[ sg.Text('Window 1'),],
- [sg.Input(do_not_clear=True)],
- [sg.Text('', key='_OUTPUT_')],
- [sg.Button('Launch 2')]]
- win1 = sg.Window('Window 1').Layout(layout)
- win2_active=False
- while True:
- ev1, vals1 = win1.Read(timeout=100)
- if ev1 is None:
- break
- win1.FindElement('_OUTPUT_').Update(vals1[0])
- if ev1 == 'Launch 2' and not win2_active:
- win2_active = True
- win1.Hide()
- layout2 = [[sg.Text('Window 2')], # note must create a layout from scratch every time. No reuse
- [sg.Button('Exit')]]
- win2 = sg.Window('Window 2').Layout(layout2)
- while True:
- ev2, vals2 = win2.Read()
- if ev2 is None or ev2 == 'Exit':
- win2.Close()
- win2_active = False
- win1.UnHide()
- break
- ```
Add Comment
Please, Sign In to add comment

